Creating an OData Publishing Endpoint using Virtuoso's ADO.NET Data Provider
Introduction
What is OData?
OData is an HTTP-based data protocol, with associated data representation formats (Atom and JSON). The underlying data model takes the form of an Entity-Attribute-Value graph, and originates from the Entity Frameworks aspect of ADO.NET. In this model, individual entities, entity attributes, and (optionally) attribute values are identified by Uniform Resource Identifiers (URIs). In short, OData decouples wire protocol data access and data representation formats from the ADO.NET platform.The simplest service consists of a single feed hosting a basic Entity-Attribute-Value model tuple represented in Atom or JSON. Typically a service will provide a number of feeds, listed in the top-level service document. The model is published at the top level as a service-specific metadata document.
Why is OData Important?
The Open Data Protocol (OData) is a protocol for sharing data. Producers expose data as an OData service at an HTTP location (i.e., a URL) which is then available to OData consumers. As the OData protocol is based on the AtomPub standard, the simplest consumer can take the form of any HTTP user agent (e.g., a Web Browser), which is then able to browse entity-attribute-value model data stored within the Atom feeds. Likewise, Rich Internet Application clients, launched from within browsers or as stand-alone applications, such as the Silverlight OData Explorer, may be used to browse this data. Either way, data from a range of disparate sources can be exposed as HTTP-accessible structured hypermedia resources (delivered by the Atom Feed).
By cleanly separating client and server roles, OData can serve as an HTTP analog of the platform-specific ODBC (version 2.0, as of this writing). As with ODBC, data consuming applications can be developed independently from data sources, and a single application can consume data from a range of disparate sources. The OData service endpoint can be specified at runtime just as an ODBC Data Source Name (DSN) would be.
How are Virtuoso and OData Connected?
Virtuoso is a hybrid data server with native data management and integration capabilities covering RDF via SPARQL, ODBC or JDBC accessible Relational Data Sources; XML via XQuery/XPath; Web Services; and other HTTP-accessible Hypermedia and non-Hypermedia resources. Virtuoso includes a high-performance native ADO.NET data provider that provides access to its Relational-, RDF Graph-, and Document-model based storage engines, and thereby also makes data from these engines accessible to OData-based data consumers.
How Do I use Virtuoso to Publish OData ?
There are two ways to produce OData from Virtuoso: one approach uses Virtuoso's built-in support of the lightweight and platform-agnostic OData protocol; the other uses Virtuoso's ADO.NET provider. This guide covers use of the ADO.NET provider.
To create an OData service endpoint using Virtuoso and its ADO.NET provider, you will need the following in place:
- Microsoft Visual Studio 2010
- The ADO.NET Entity Framework 4.0 runtime and associated tools (included in Visual Studio 2010, but not installed by default)
At the start of your Visual Studio project creation, you must establish a connection with the database(s) hosting the data to be exposed by the service. Once a connection has been established, you can generate a data model which lays the foundation for publishing an OData service.
The following steps show how to expose the Northwind Demo database in Virtuoso as an OData Service using the Virtuoso ADO.NET Provider:
- Launch the Visual Studio 2010 IDE.
- Choose New Project from the File menu to create a Web Application project.
- When the New Project window appears, choose either Visual Basic or Visual C# as the programming language.
- Within the language category, click on Web, and select ASP.NET Web Application from the right-hand panel.
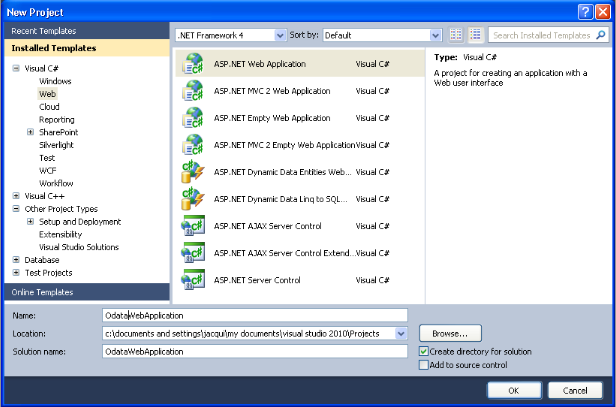
- Choose a name for the project, for example
ODataWebApplication, and click OK. - This will create a new project called OdataWebApplication.

- To set up the database connection and generate the data model, right click on the OdataWebApplication project name in the Solution Explorer pane; then select the Add -> New Item menu item.
- The Add New Item dialog will appear.
Choose Data from the Installed Templates; then select the ADO.NET Entity Data Model template from the right-hand pane.
Name the model
DemoModel.edmx, and click Add to start the creation of the ADO.NET Entity Data Model.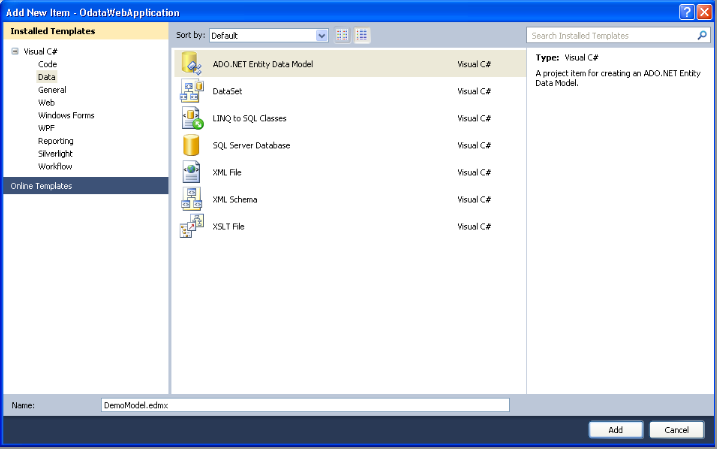
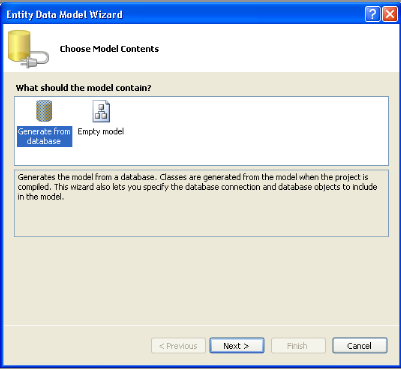
- In the Entity Data Model Wizard dialog's Choose Model Contents pane, select the Generate from Database model type and click Next.
- In the Entity Data Model Wizard dialog's Choose your Data Connection pane, select the New Connection button.

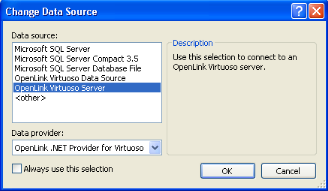
- In the Choose Data Source dialog, select the OpenLink Virtuoso Data Source from the list displayed and click Continue.
- In the Add Connection dialog, specify the hostname, port number, username, and password for the target Virtuoso Server and check the Save Password box.
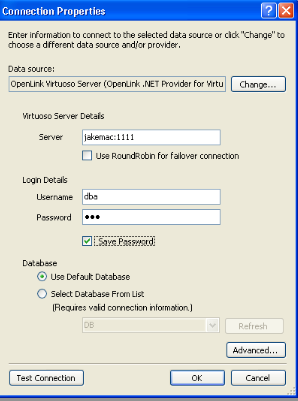
- Select the Select Database From List radio button and choose Demo from the drop down list, assuming the Virtuoso Demo Database is installed.
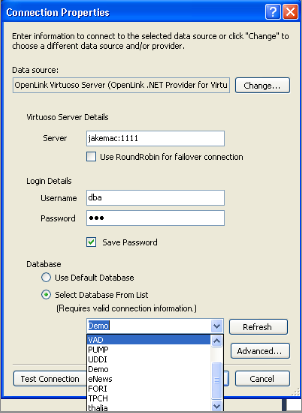
- Click the Test Connection button to verify the connection is successful and then click OK to add the connection.
- Set the entity connect string name to
VirtuosoDemoEntities(remember the name you set here, as it is required in step 20 below) and click Next.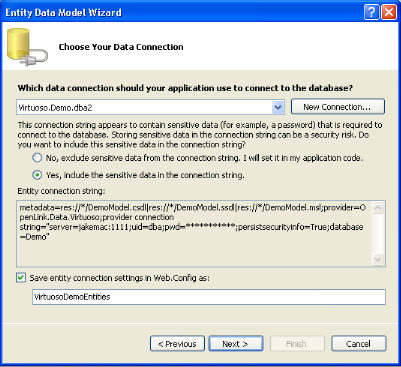
- In the Choose your Database Objects pane, tick the Tables check-box to select all tables in the Demo database for addition to the Entity Data Model, set the Model Namespace to VirtuosoDemoModel, and click Finish.
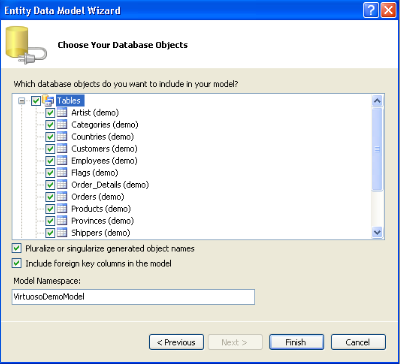
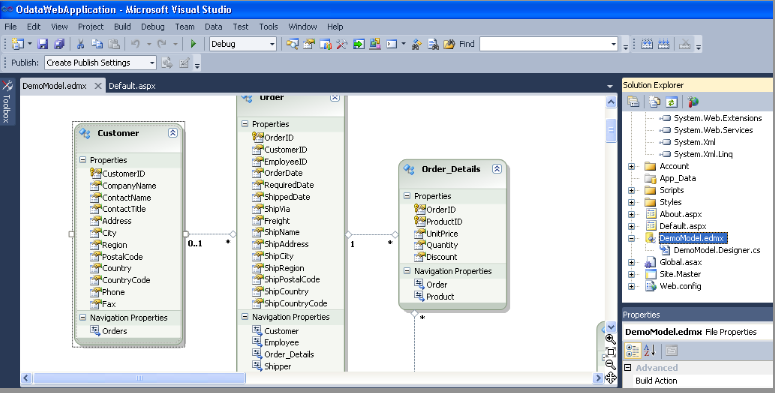
- The VirtuosoDemoModel.edmx EDM will be created, with the tables and relationships displayed in the Visual Studio IDE.
- Now to create the service. Right click on the ODataWebApplication project name of the Solution Explorer pane, then select the Add -> New Item menu item.
- The Add New Item dialog will appear.
Select Web from the installed templates, and choose the WCF Data Service template in the right-hand pane.
Name the service
VirtuosoOData.svc, and click Add to create the OData Service.
- In the
VirtuosoOData.svc.csData Service file created by the steps above, add the data source class name ofVirtuosoDemoEntities(note: this is the name set in step 15, above) as the DataService name, and enable access to the Data Service by adding the entryconfig.SetEntitySetAccessRule("*", EntitySetRights.All);in the InitializeService method.
public static void InitializeService(DataServiceConfiguration config) { // TODO: set rules to indicate which entity sets and service operations are visible, updatable, etc. // Examples: // config.SetEntitySetAccessRule("MyEntityset", EntitySetRights.AllRead); // config.SetServiceOperationAccessRule("MyServiceOperation", ServiceOperationRights.All); config.SetEntitySetAccessRule("*", EntitySetRights.All); config.DataServiceBehavior.MaxProtocolVersion = DataServiceProtocolVersion.V2; } - To test the OData Service, simply hit
Ctrl+F5within Visual Studio, which will start the development web server, run the OData Services server therein, and load a Web browser page displaying the list of available tables/entities of the Demo database.
How do I Consume the Published OData?
The simplest way to consume the service is to use a web browser to browse the Atom feed.
This is what is done when testing the service in Visual Studio.
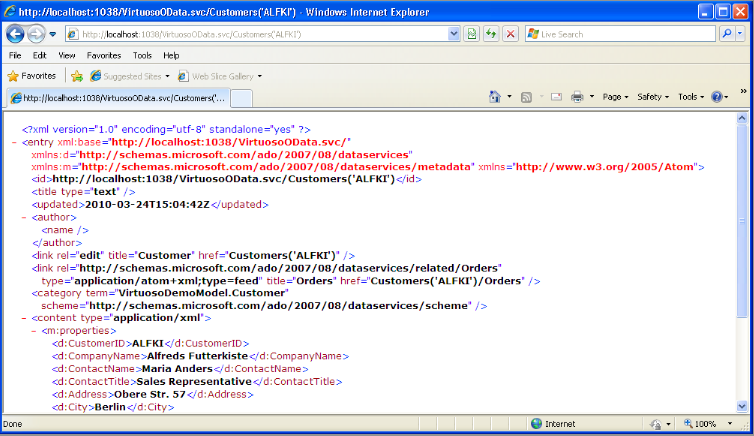
As well as the top-level list of feeds provided by the service, it is straightforward to access a specific entity instance.
For example, to access the ALFKI record of the Customers table, simply append /Customers('ALFKI') to the service root URI.
Similarly, the metatdata document can examined by appending /$metadata to the service instance URI.
The metadata document is useful for finding information about the entities provided on the service.
Alternatively, the service can be consumed by a more sophisticated application like the Silverlight OData Explorer.
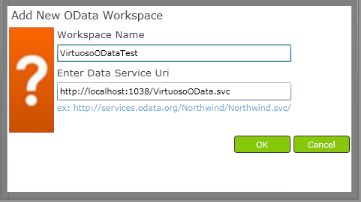
- While the OData service is running, open the Silverlight OData Explorer as a stand-alone application on the local machine.
- Choose a workspace name, and give your data service root URI.
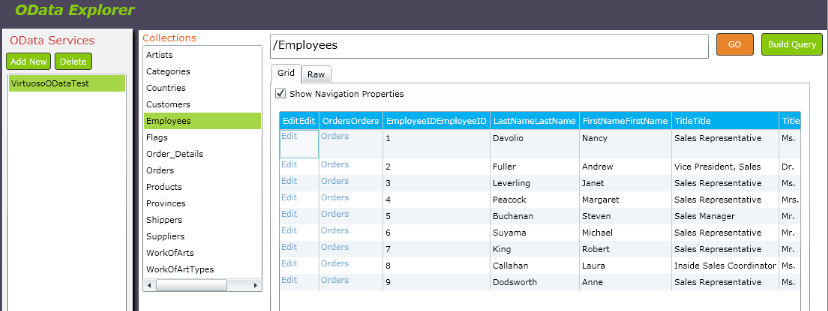
- The entity types available on your service are listed in the Collections box, and by selecting one, you can see a list of all entities of the chosen type.
The Silverlight OData Explorer also allows you to update data via the service. For example:
- List the
Customersentities.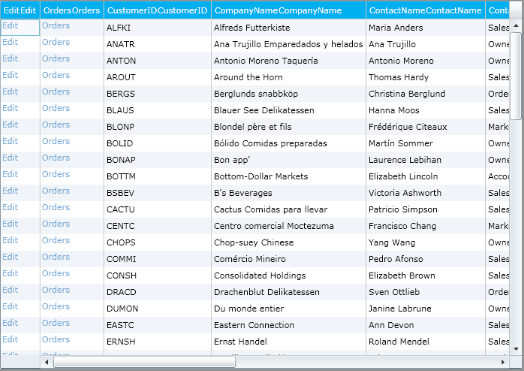
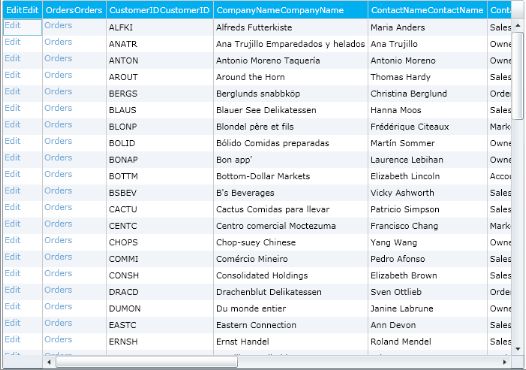
- Click the Edit button at the left of the record you wish to update.
This opens an edit dialog where you can make changes to the attributes of the entity.

- By clicking SaveChanges, you propagate your edits back to the underlying data store.
If you close the edit box and reload the list of entities, you will see that the record has been updated.
Notes
- Important - To view Atom data (the default format returned by an ADO.NET Data Service) in Internet Explorer, you must first ensure that Feed Reading View is turned off. This can be done on the Content tab of Tools in Internet Options.
- If a Data Services entity instance URI page fails to load, turn Verbose errors on by adding
config.UseVerboseErrors = true;to thevirtuoso.svc.csInitializeService method to obtain more detailed information from the server as to why the page failed to load:
      public static void InitializeService(IDataServiceConfiguration config)
      {
      config.UseVerboseErrors = true;
      config.SetEntitySetAccessRule("*", EntitySetRights.All);
      }