Enhancing Virtuoso SQL Data Access with the
SQL-oriented connectivity to back-end databases is increasingly challenged by matters of identity fidelity, which arise from the combination of user roles and privileges, data access tools, and connection origins. Basically, it's no longer adequate to frame user profiles solely by local data.
To address this problem, it's imperative that database access may be constrained by an identity mechanism that blends web-of-trust logic and existing transport protocols into a policy-based data-access matrix. This is what the WebID Protocol delivers; hence, the deep integration of this capability in Virtuoso.
Virtuoso's SQL-channel connection security, over all data access mechanisms (ODBC, JDBC, ADO.NET, OLE DB, and XMLA), has been significantly enhanced by implementation of the
Exploiting the combined powers of Virtuoso and the
- How It's Done
- Step-By-Step Example
- Prerequisites
- Basic Steps
- 1 - Set up local CA certificate
- 2 - Export the id_rsa certificate pem content
- 3 - Create Certificate from type Server/TLS
- 4 - Load the generated "ODBC.p12" for "dba" account
- 5 - Virtuoso INI Configuration
- 6 - Generate X.509 Certificate hosted Web ID
- 7 - Adding the "Demo.pem" certificate to the Web ID owner FOAF file
- 8 - Setting Web ID to local user from type "SQL/ODBC"
- 9 - Creating sample table and granting access to it from the "SQL/ODBC" type user
- 10 - Perform SQL login with certificate that contains the Web ID from above
- Related
How It's Done
A Virtuoso instance is configured to operate in SSL/TLS mode (either client-only or mutual authentication) by setting the X509ClientVerify value in the database server configuration (INI) file:
-
0- Do not require SSL/TLS (default). -
1- Require trusted certificate. -
2- Request certificate; if provided, accept only if verified/trusted; traditional login is also acceptable. -
3- Request certificate; if provided, accept any certificate, including self-signed; traditional login is also acceptable.
Virtuoso INI Configuration
A typical INI file would contain either —
[Parameters]
...
SSLServerPort     = 1113
;PEM file holding a Public Key:
SSLCertificate    = keys/server.crt
;PEM file holding Private Key associated with Public Key above:
SSLPrivateKey     = keys/server.key
X509ClientVerify  = 3
...
— or —
;Public Key imported into Virtuoso's Native Key Store via PKCS#12 file import:
SSLCertificate    = db:server_key
;Private Key imported into Virtuoso's Native Key Store via PKCS#12 file import:
SSLPrivateKey     = db:server_key
Also note that on Windows, Virtuoso can be associated with the operating systems native keystore with regards to Public and Private Key access.
Presuming this instance were running on demo.example.com, a basic iSQL client could connect with this command:
isql demo.example.com:1113 "" -X client.p12 -T server.crt
Note: The client certificate file, client.p12, contains a
Step-By-Step Example
Prerequisites
- Server version: Virtuoso server must be version
06.03.3131or higher. - Packages: The following VAD packages (downloadable here) should be installed:
- Virtuoso Conductor (
conductor_dav.vad) - ODS-Framework (
ods_framework_dav.vad) - Linked Open Data Transformation Middleware ("Sponger") (
rdf_mappers_dav.vadorcartridges_dav.vad) - HTML based Identity Card (X.509 Certificate) Generator (
certgen_html_dav.vad)- Note: You can also use our online Certificate Generator
- Virtuoso Conductor (
- Personal
WebID: you can create such following these steps. - Note: In the example we will use the following
WebID for user "demo", as registered on the ID.MyOpenLink Dataspace instance:
http://id.myopenlink.net/dataspace/person/demo#this
- Note: In the example we will use the following
Basic Steps
1 - Set up local CA certificate
Make sure using your local Virtuoso instance Conductor (at http://{virtuoso-host-FQDN[:{listen-port}]}/conductor, e.g., http://my-host.example.com:8890/conductor) you had set up a local CA certificate with name "id_rsa".
See example scenario

2 - Export the id_rsa certificate pem content
- Execute from isql:
SQL> SELECT xenc_pem_export ('id_rsa');
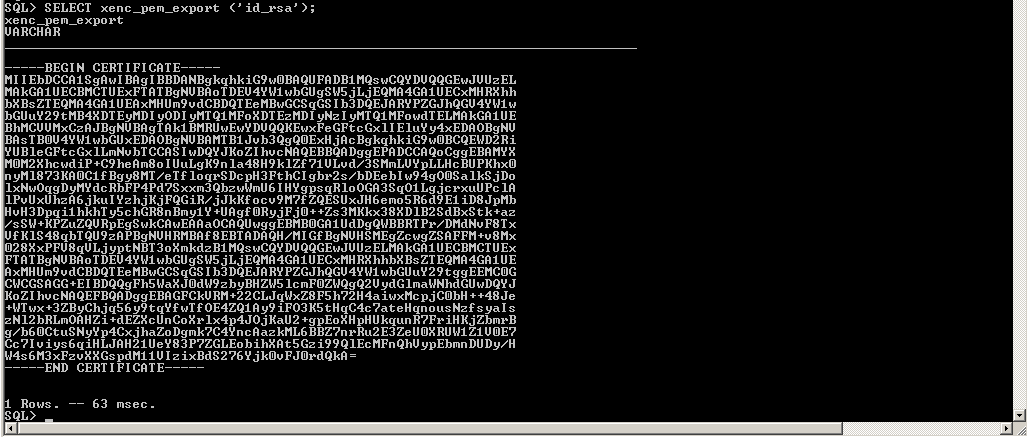
- Copy the extracted content to a file for ex. with name "rca.pem".
3 - Create Certificate from type Server/TLS
- Go to http://cname/certgen/
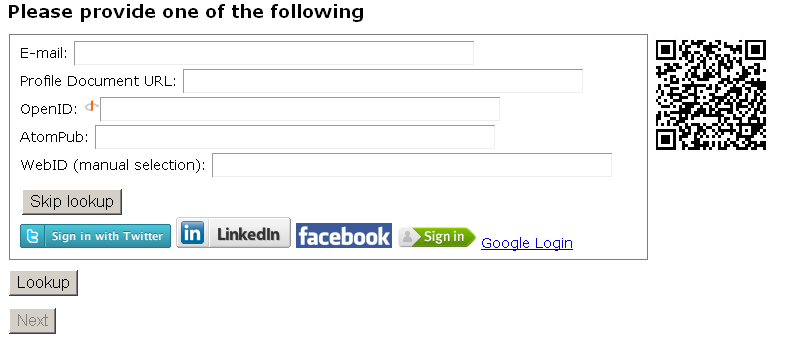
- Enter "E-mail" for ex.
"dba@example.com:

- Click "Skip lookup":

- In the presented "Certificate details" form:
- Enter "Name" for ex. "ODBC";
- Enter "Organization" for ex. "Example Inc.";
- Select "HTTP/TLS Server Identity" radio-box:
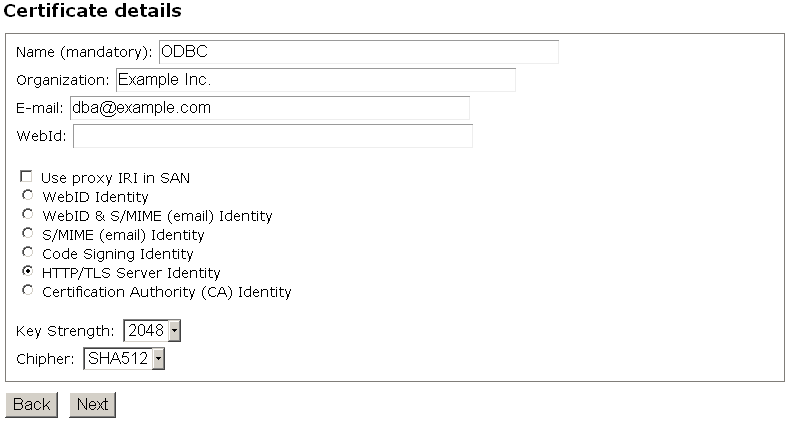
- Click "Next"
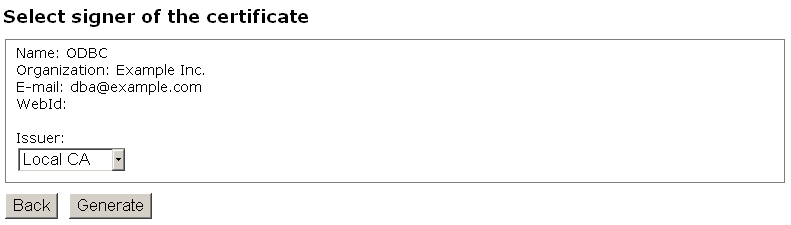
- In the presented "Signer Certificate" form leave the "Issuer" default value "Local CA" and click "Generate":
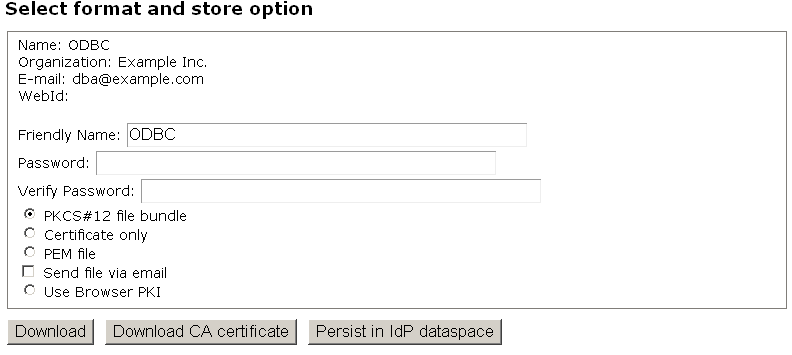
- Next in the "Format and Store" form enter password for the certificate and click "Download".
- The "ODBC.p12" file should be stored in your local file system.
4 - Load the generated "ODBC.p12" for "dba" account
- Go to Conductor → System Admin → User Accounts → "dba" → Action "Edit":
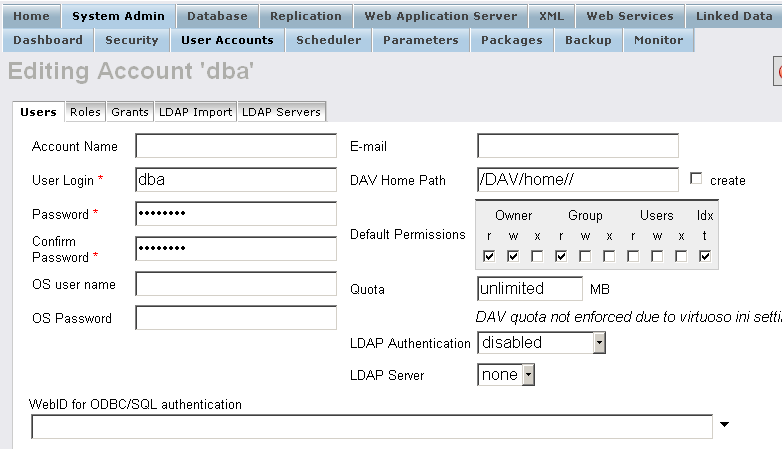
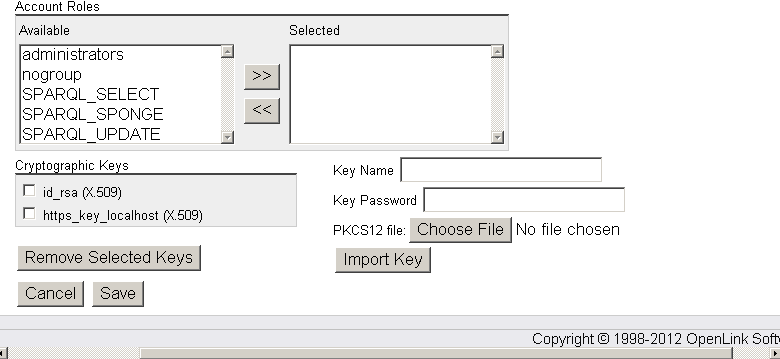
- Enter "Key Name": dbms, the key password and click "Choose File" to select the "ODBC.p12" certificate
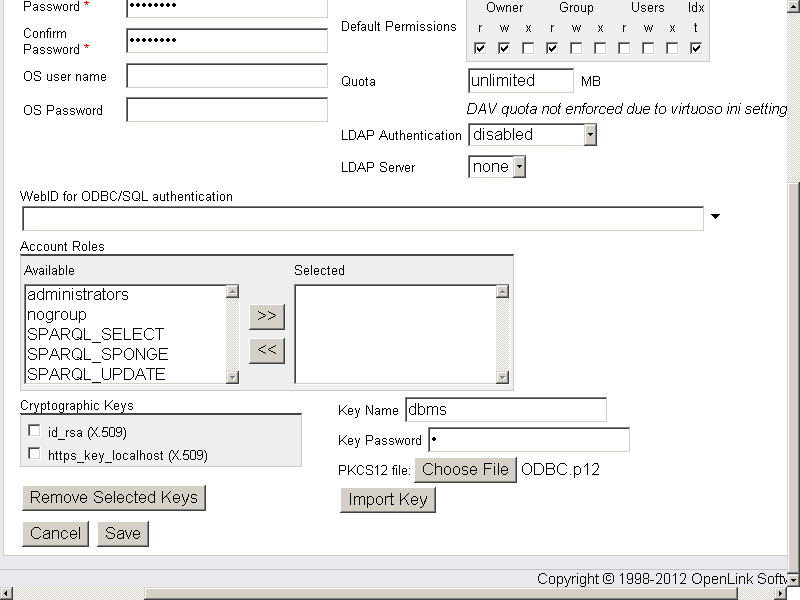
- Click "Import Key".
- On a successful import the dbms key should be presented in the "Cryptographic Keys" list:
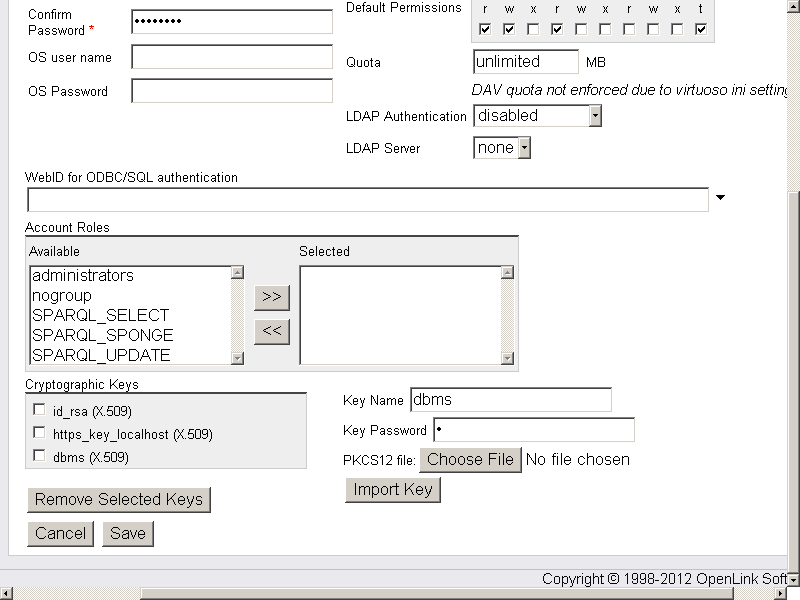
- Click "Save".
5 - Virtuoso INI Configuration
- Configure your Virtuoso
iniby editing the following lines to theParameterssection:- Note: Alternatively you can save the public and private keys to PKCS#12 (.p12) file and then use this file from your file system via an INI file reference.
However, in this mode, you will have to deal with a password challenge thus you have to start with -f option in order to provide a password to open the key.
...
[Parameters]
SSLServerPort          = 1113
SSLCertificate         = db:dbms
SSLPrivateKey          = db:dbms
X509ClientVerify        = 3
X509ClientVerifyDepth   = 15
...
- Note: Alternatively you can save the public and private keys to PKCS#12 (.p12) file and then use this file from your file system via an INI file reference.
However, in this mode, you will have to deal with a password challenge thus you have to start with -f option in order to provide a password to open the key.
- Restart the Virtuoso server.
6 - Generate X.509 Certificate hosted Web ID
- Go to http://cname/certgen/
- In the presented form:
- Enter "E-mail" for ex.: "demo@example.com"
- Enter "
WebID" for ex.: "http://id.myopenlink.net/dataspace/person/demo#this"
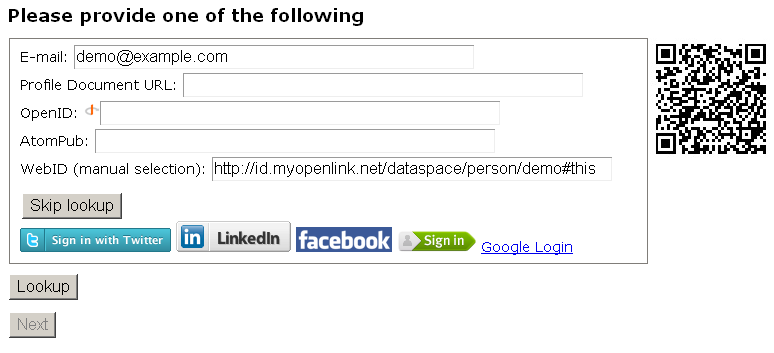
- Click "Skip lookup":
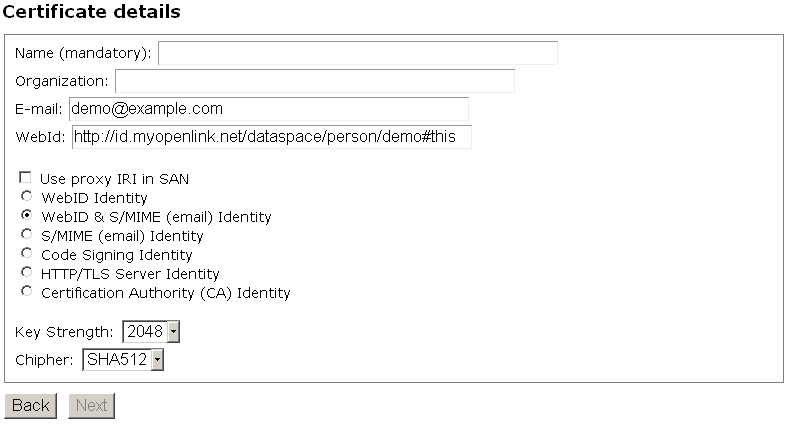
- In the "Certificate details" form:
- Enter "Name" for ex. "Demo";
- Enter "Organization" for ex. "Example Inc.";
- Leave the select "
WebID & S/MIME (email) Identity" radio-box. Another variant is also valid to select the " WebID Identity" radio-box.
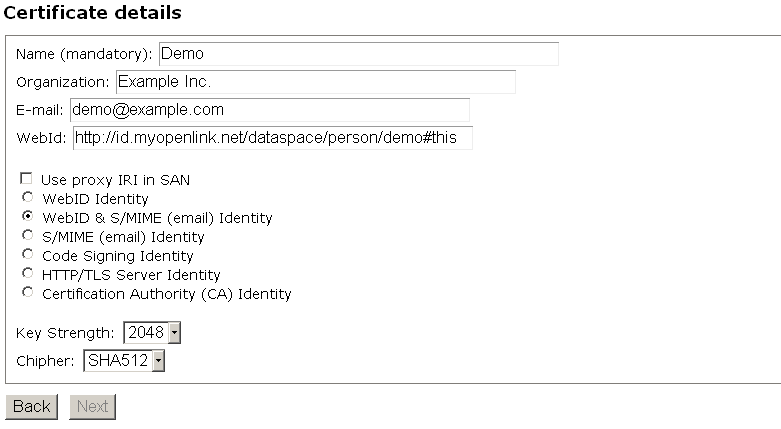
- Click "Next":
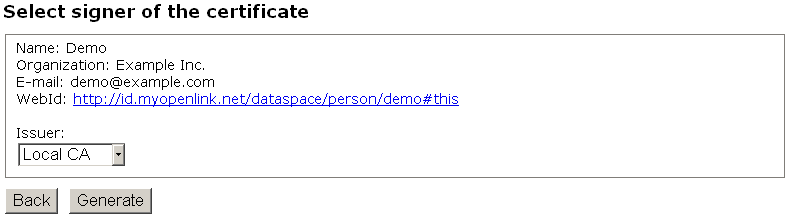
- In the presented "Signer Certificate" form leave the "Issuer" default value "Local CA" and click "Generate":
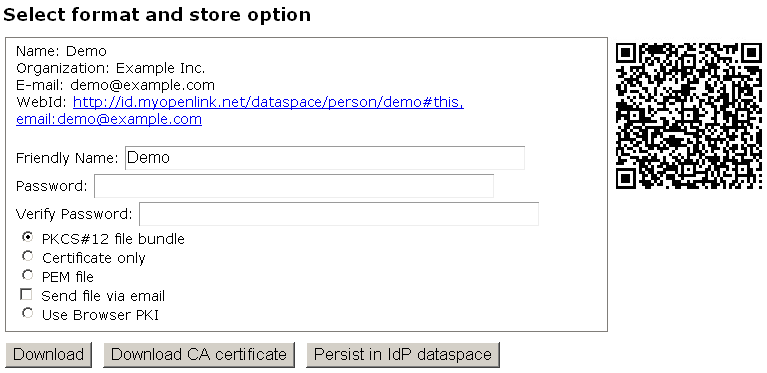
- Next in the "Format and Store" form enter password for the certificate and leave selected the option "PKCS#12 file bundle".
- Click "Download".
- The "Demo.p12" file should be stored in your local file system → the folder where isql is located.
- Next select the option "PEM file" and click "Download".
- The "Demo.pem" file should be stored in your local file system → the folder where isql is located.
7 - Adding the "Demo.pem" certificate to the Web ID owner FOAF file
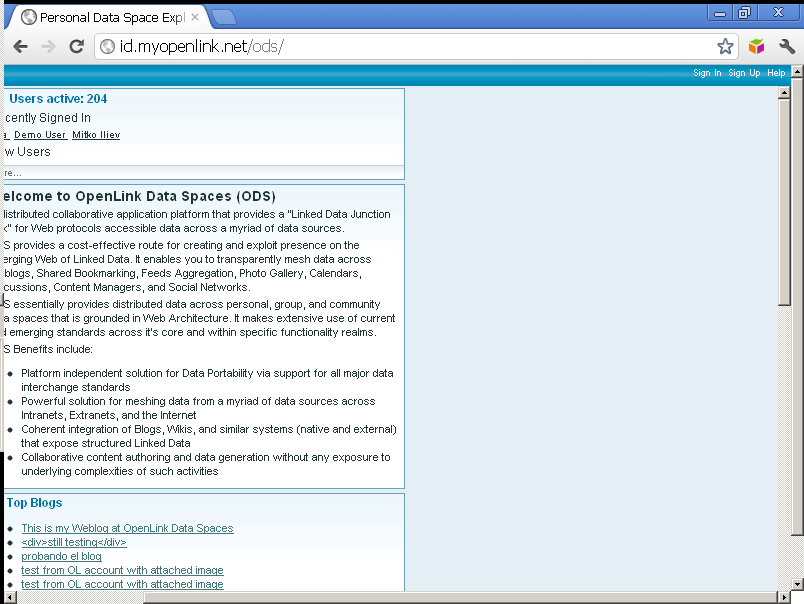
- Go to the instance where your user is registered.
As in this example we have used user "demo" from the http://id.myopenlink.net/ods as next step we go to it:
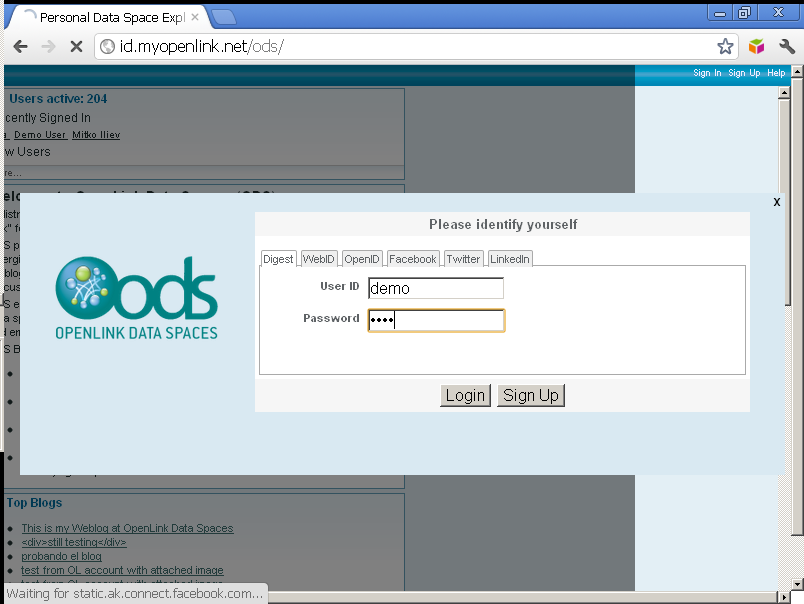
- Click "Sign In" and enter user demo credentials:
- Go to Profile Edit → Security → X.509 Certificates
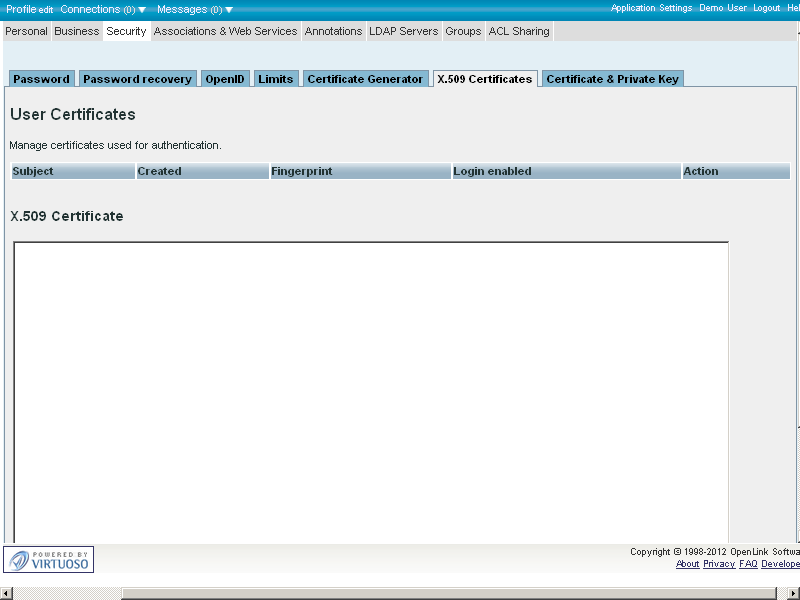
- Enter in the "X.509 Certificate" text-area the content of the generated from above "Demo.pem":
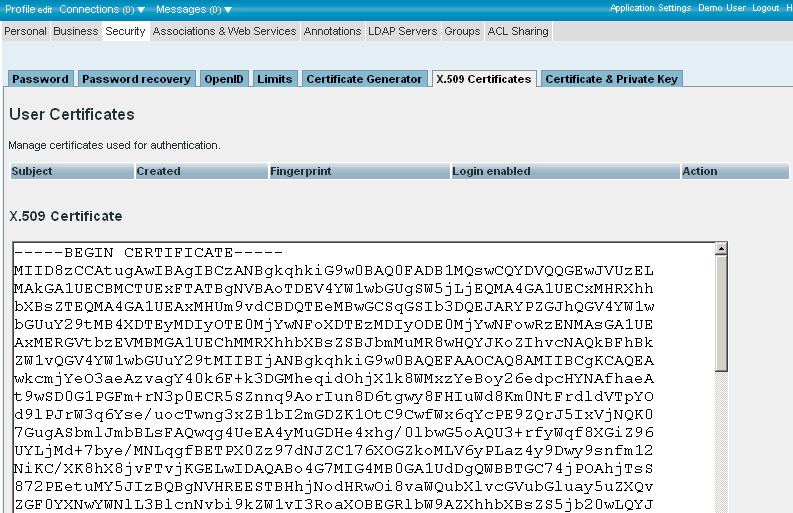
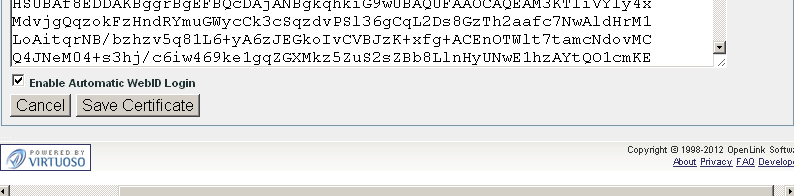
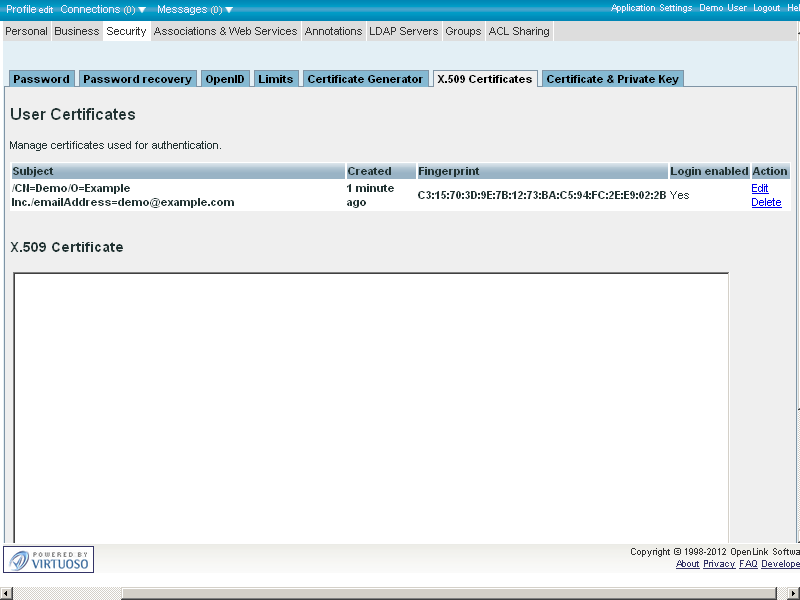
- Click "Save Certificate".
- The created certificate should appear in the list of available for this user certificates:
8 - Setting Web ID to local user from type "SQL/ODBC"
- Go to your local Virtuoso instance Conductor (at http://{virtuoso-host-FQDN[:{listen-port}]}/conductor, e.g., http://my-host.example.com:8890/conductor):
- Enter "dba" user credentials and click "Login":
- Go to System Admin → User Accounts
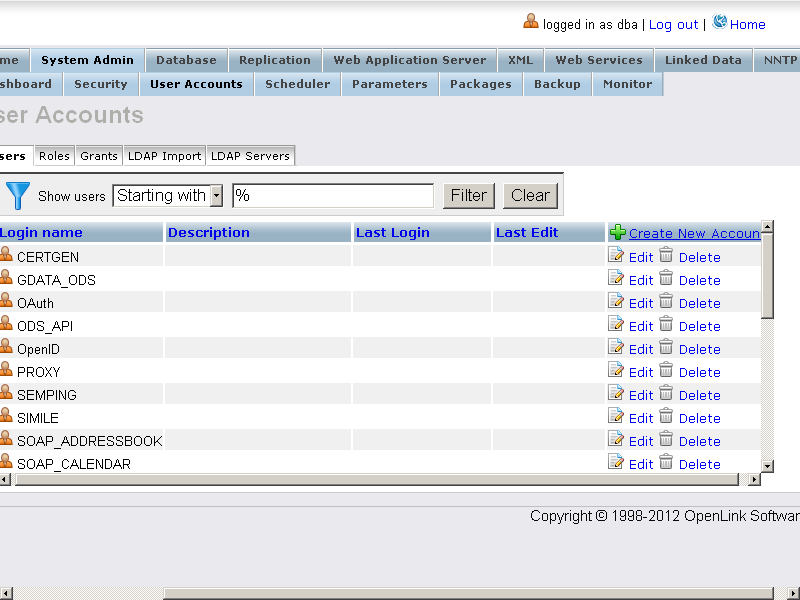
- For existing user from type "SQL/ODBC" ( or "SQL/ODBC and WebDAV" ) or for a new created user from the same type, edit the user's properties by clicking the "Edit" link.
In this example we will use user "demo":
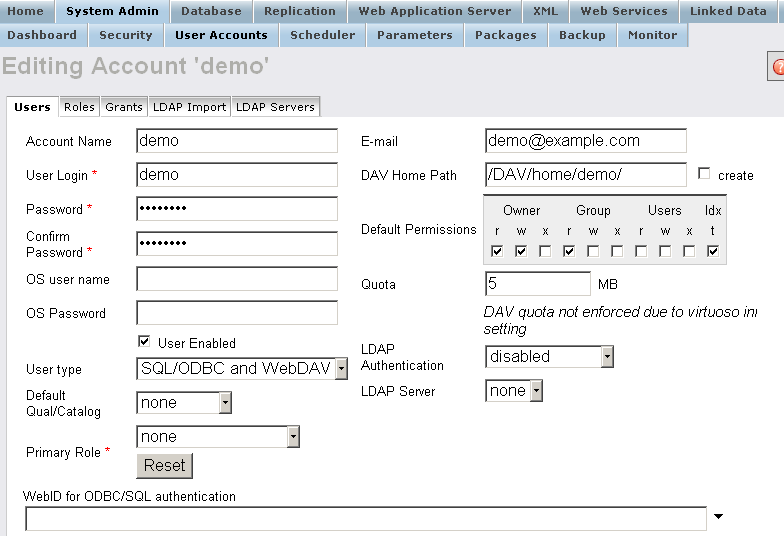

- Enter in the "
WebID for ODBC/SQL authentication" field the WebID from above, i.e.:
http://id.myopenlink.net/dataspace/person/demo#this

- Click "Save".
9 - Creating sample table and granting access to it from the "SQL/ODBC" type user
- Go to Conductor → Database → Interactive SQL
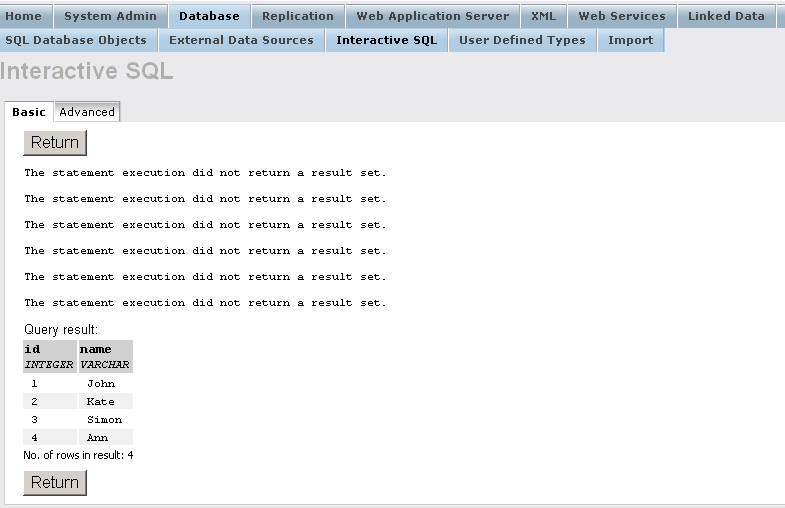
- Execute the following statements:
DROP TABLE EXAMPLE_DATA;
CREATE TABLE EXAMPLE_DATA
(
  "id"   INTEGER,
  "name" VARCHAR(100),
  PRIMARY KEY ("id")
);

INSERT
  INTO EXAMPLE_DATA ("id", "name")
  VALUES (1, 'John');
INSERT
  INTO EXAMPLE_DATA ("id", "name")
  VALUES (2, 'Kate');
INSERT
  INTO EXAMPLE_DATA ("id", "name")
  VALUES (3, 'Simon');
INSERT
  INTO EXAMPLE_DATA ("id", "name")
  VALUES (4, 'Ann');

SELECT * FROM EXAMPLE_DATA;
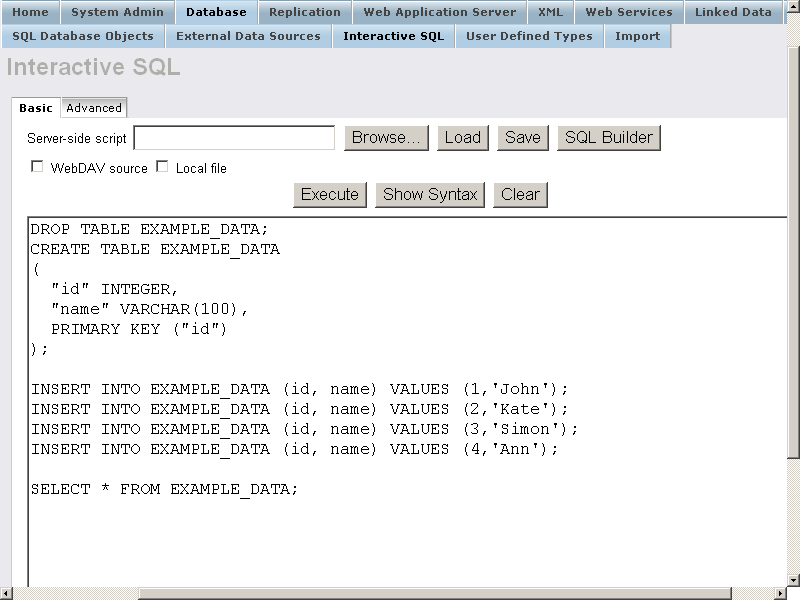
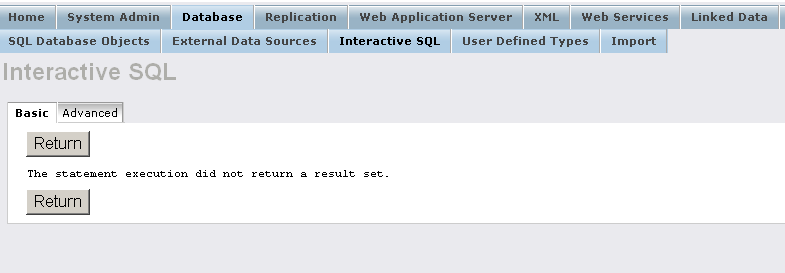
- Grant select rights for user "demo":
GRANT SELECT
  ON EXAMPLE_DATA
  TO demo;

10 - Perform SQL login with certificate that contains the Web ID from above
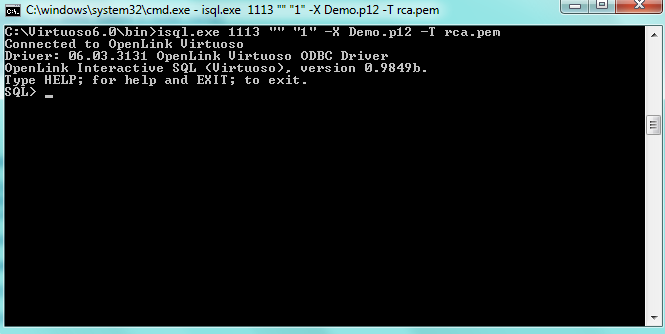
- Execute from Command Prompt:
isql 1113 "" "<Demo.p12's password>" -X Demo.p12 -T rca.pem
For example:
isql 1113 "" "1" -X Demo.p12 -T rca.pem
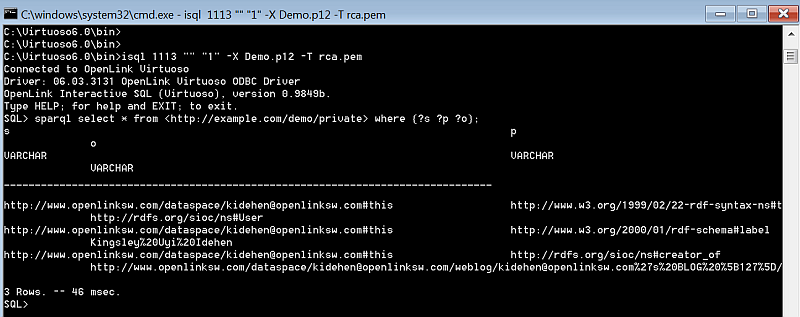
- Execute the following SELECT statement:
SPARQL SELECT *
  FROM <http://example.com/demo/private>
  WHERE { ?s ?p ?o };
- The table's data should be displayed.
Related
- Safeguarding your Virtuoso-hosted SPARQL Endpoint
- SPARQL Endpoint Protection Methods Collection
- Virtuoso documentation
- Virtuoso Tips and Tricks Collection
- SPARUL over SPARQL using the http://cname:port/sparql-auth endpoint
- Virtuoso Authentication Server UI
- Manage a SPARQL-WebID based Endpoint
- Configure Virtuoso instance as an X.509 Certificate Authority and HTTPS listener
- Configure Virtuoso+ODS instance as an X.509 Certificate Authority and HTTPS listener
- WebID Protocol Support in OpenLink Data Spaces
- Manage ODS Datadspaces Objects
WebID Access Control Lists (ACLs): - Guide for Set up a X.509 certificate issuer and HTTPS listener and generate ODS user certificates.
- Setting up PubSubHub in ODS
- PubSubHubbub Demo Client Example
- Feed subscription via PubSubHub protocol Example
- Setting Up PubSubHub to use WebID Protocol or IP based control lists
- CA Keys Import using Conductor
- Generate an X.509 Certificate hosted WebID Guide
- Generate an X.509 Certificate (with a WebID watermark) to be managed by host operating system keystore
- Generate an X.509 Certificate (with a WebID watermark) to be managed by a browser-based keystore
- Using Virtuoso's WebID Verification Proxy Service with a WebID-bearing X.509 certificate
- Using Virtuoso's WebID Identity Provider (IdP) Proxy Service with an X.509 certificate
- ODS Briefcase WebID Protocol Share File Guide
- WebID Protocol Specification
- Test WebID Protocol Certificate page
- WebID Protocol Certificate Generation page