Enabling Dynamic Extended Types (DETs) on a Virtuoso SPARQL Endpoint
Conventional SPARQL endpoints serialize query results into a range of formats, which are immediately sent back to the requesting user agent.
Using SPARQL-Protocol URLs to share result sets is powerful, but this is not always feasible, especially because some data access tools are written to only load data from files.
Virtuoso addresses the obvious need for file-based access to SPARQL query result sets via its built-in "dynamic WebDAV resource generator," a feature that leverages the Virtuoso server's native support of the WebDAV protocol. Through this feature, it is possible to connect any WebDAV client, which include most desktop operating systems (Windows, Mac OS X, Linux) and many other applications (e.g., Excel), directly to a SPARQL query result set as though it were opening up a local file.
The steps below show how to set up a Virtuoso instance to permit saving query results from its SPARQL endpoint into its built-in WebDAV repository.
Note: SPARQL-SSL is alias of SPARQL-WebIDConfiguration
SPARQL-WebID
- Make sure the steps from the Secure SPARQL Endpoint Guide using WebID Protocol are performed.
- As result should be created new account "SPUIDN", where N is 1, 2, etc.
- Note: for the purposes of this guide, we will use SPUID1 name for the SQL user account under which runs the Web Service endpoint.
- Set the SQL user account to be DAV enabled:
- The DAV home directory (for e.g., /DAV/home/SPUID1/) should be created and the path to it should be set in the table: DB.DBA.SYS_USERS (using U_HOME field).
Note: do not forget the leading and the trailing slash chars:
- Using Conductor, go to System Admin -> User Accounts
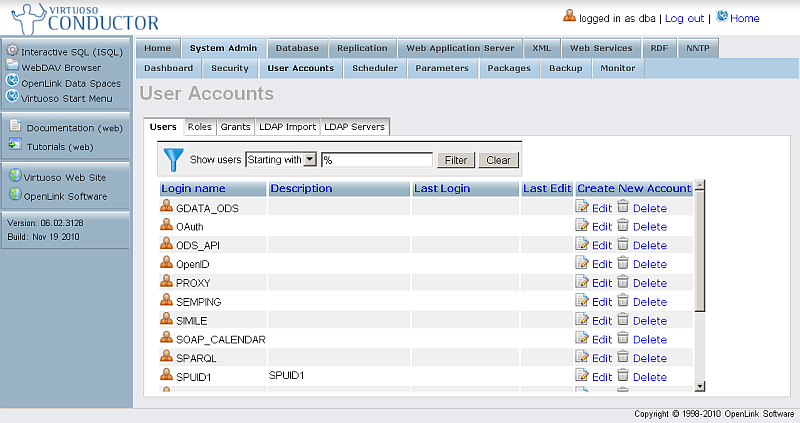
- For the SQL User from above click the "Edit" link from the very right column.
- Set "DAV Home Path" to "/DAV/home/SPUID1/"
- Hatch "Create"
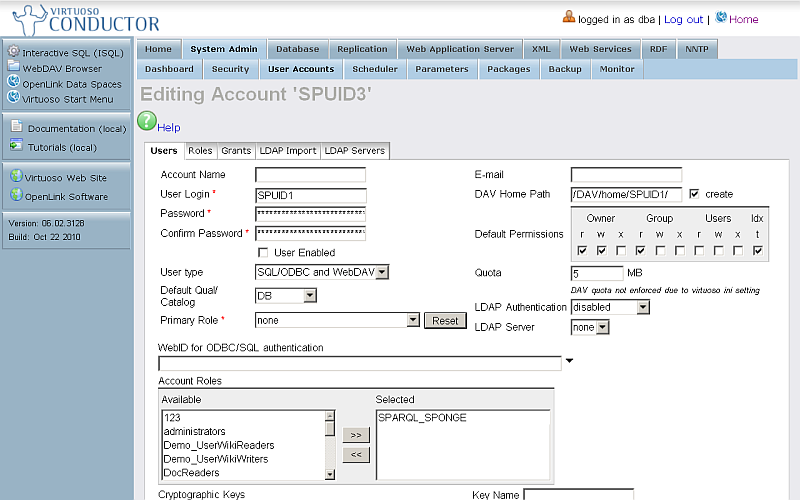
- Click "Save".
- Using Conductor, go to System Admin -> User Accounts
- The home directory should contain a subdirectory named "saved-sparql-results"
- Using Conductor, go to Web Application Server -> Content Management and view path "DAV/home/SPUID1":
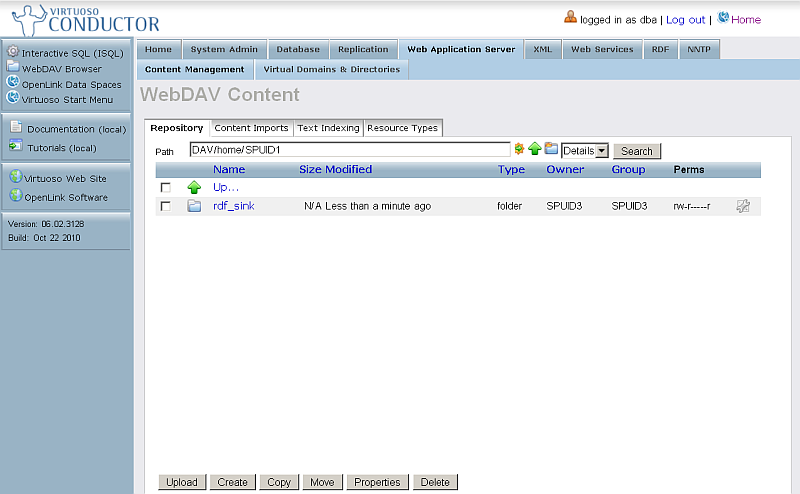
- Click "New Folder"
- In the shown form enter for "Folder name": saved-sparql-results
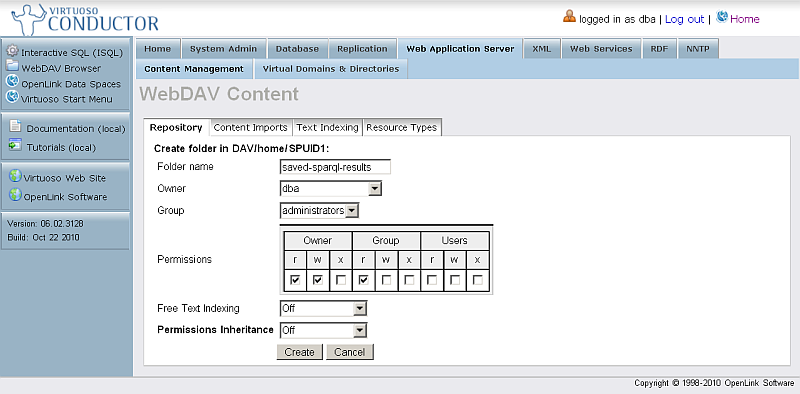
- Click "Create"
- Note: the subdirectory should be of "DynaRes" for DAV Extension Type.
- Using Conductor, go to Web Application Server -> Content Management and view path "DAV/home/SPUID1":
- Make sure sparql-webid virtual folder is defined for the ssl port:
- Go to Conductor -> Web Application Server ->Virtual Domains & Directories
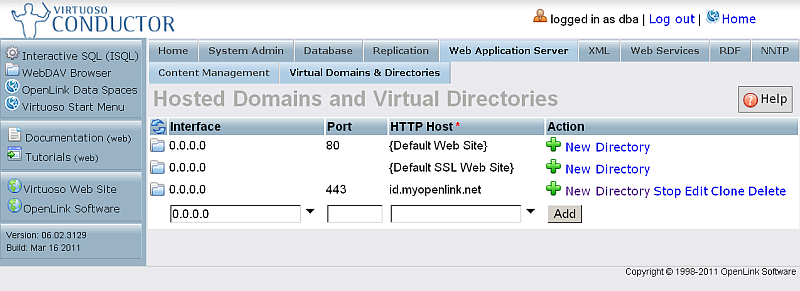
- Locate the sparql-webid virtual folder. If not found, click "New directory"
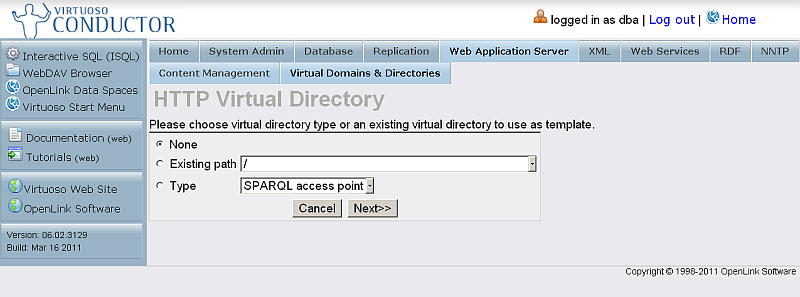
- Select "Type": SPARQL access point and click "Next":
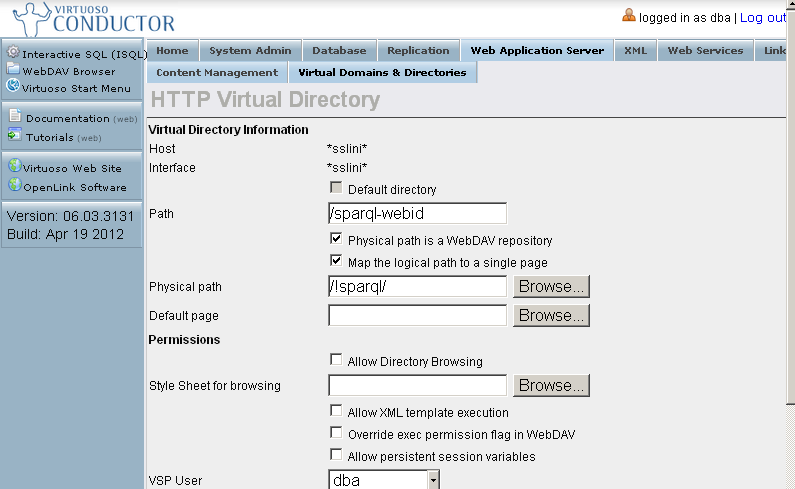
- In the presented form enter respectively:
- Path: /sparql-webid
- Hatch "Physical path is a WebDAV repository"
- Hatch "Map the logical path to a single page"
- Physical path: /!sparql/
- VSP User: dba
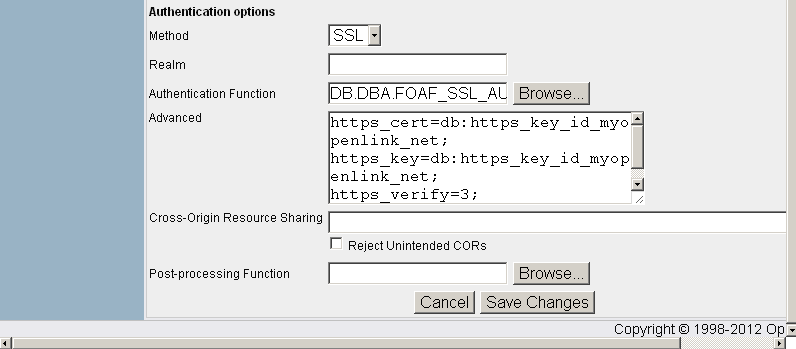
- Authentication Method: SSL
- Authentication Function: DB.DBA.FOAF_SSL_AUTH
- Advanced:
https_cert=db:https_key_cname;
https_key=db:https_key_cname;
https_verify=3;
https_cv_depth=10;
- Note: cname appearances of "." should be replaced with "_", so for ex for host "id.myopenlink.net" the advanced option value should be:
https_cert=db:https_key_id_myopenlink_net;
https_key=db:https_key_id_myopenlink_net;
https_verify=3;
https_cv_depth=10;
- Go to Conductor -> Web Application Server ->Virtual Domains & Directories
- Once the steps from above have been completed, your SPARQL endpoint will include additional controls for saving query results to dynamically constructed WebDAV resources:
- Go to the SPARQL+WebID endpoint,
https://<cname>:<port>/sparql-webid, where<cname>:<port>are replaced by your local server values. - Select the user's certificate:

- The SPARQL Query UI will be shown:

- Go to the SPARQL+WebID endpoint,
Related
- Safeguarding your Virtuoso-hosted SPARQL Endpoint
- SPARQL Endpoint Protection Methods Collection
- Virtuoso documentation
- Virtuoso Tips and Tricks Collection
- SPARUL over SPARQL using the http://cname:port/sparql-auth endpoint
- Virtuoso Authentication Server UI
- Manage a SPARQL-WebID based Endpoint
- Configure Virtuoso instance as an X.509 Certificate Authority and HTTPS listener
- Configure Virtuoso+ODS instance as an X.509 Certificate Authority and HTTPS listener
- WebID Protocol Support in OpenLink Data Spaces.
- Manage ODS Datadspaces Objects WebID Access Control Lists (ACLs):
- Guide for Set up a X.509 certificate issuer and HTTPS listener and generate ODS user certificates.
- Setting up PubSubHub in ODS
- PubSubHubBub Demo Client Example
- Feed subscription via PubSubHub protocol Example
- Setting Up PubSubHub to use WebID Protocol or IP based control lists
- CA Keys Import using Conductor
- Generate an X.509 Certificate hosted WebID Guide
- Generate an X.509 Certificate (with a WebID watermark) to be managed by host operating system keystore
- Generate an X.509 Certificate (with a WebID watermark) to be managed by a browser-based keystore
- Using Virtuoso's WebID Verification Proxy Service with a WebID-bearing X.509 certificate
- Using Virtuoso's WebID Identity Provider (IdP) Proxy Service with an X.509 certificate
- ODS Briefcase WebID Protocol Share File Guide
- WebID Protocol Specification
- Test WebID Protocol Certificate page
- WebID Protocol Certificate Generation page