VOS.VirtuosoOdsUbiquityTutorialsSubscrCalendar
Calendar Subscription Ubiquity Tutorial
This tutorial demonstrates how to subscribe to MyOpenlink server Calendar for user demo from OpenLink Demo server Calendar instance for user demo.
Ubiquity Commands Subscription
If not already subscribed, perform the following steps:
- Go to http://demo.openlinksw.com/ods/ods_ubiquity.html
- Click the button "Subscribe"
- Click the button "I know what I'm doing. Subscribe to it".
- As result should be shown message for "Subscription Successful" and we are ready to perform the steps from the tutorial.
Initial conditions
In order to be executed correctly the steps below, there should be ODS Calendar instance for user demo at the Demo server and there should be ODS Calendar instance for user demo at the MyOpenlink server. If not existing, it is enough after log in to go to Calendar from the left ODS Vertical Main Navigation. This will cause automatically to be created ODS Calendar instance.
Prepare the file to which the subscription will refer
Note: If there is already such file, you can skip the steps in this section and continue with the Basic Tutorial Steps section
- Authenticate using ODS command mode:
- sid:
- Execute the command:
ods-host http://demo.openlinksw.com/ods
-
- Execute the command:
ods-set-mode sid
-
- Execute the command:
ods-authenticate-user demo password demo
-
- Execute the command:
- oauth: detailed description you can find here.
- sid:
- Execute the command:
ods-get-instance-id mycalendar
-
- As result will be shown the instance id. For the "mybokmarks" instance this should be 59.
- Execute the command:
ods-create-calendar-publication 59 name MyCalendar destinationType WebDAV destination /DAV/home/demo/mc.ics userName demo userPassword demo
-

- Note that you can also set destination Type to URL and destination to http://myopenlink.net:8890/DAV/home/demo/mc.ics for ex. In this case, several steps below when the user tries to subscribe for Calendar in mc.ics file, need to set as sourceType WebDAV and the source value should be then /DAV/home/demo/mc.ics
-
- As result the publication will be created and will be shown its id (for ex. 2).
- To synchronize you can use ubiquity command or the Calendar UI:
- Using the ubiquity sync command:
- Execute the command:
ods-sync-calendar-publication 2
- As result should be shown message for Success.
- Execute the command:
- Using the Calendar UI:
- Go to http://demo.openlinksw.com/ods
- Log in as demo password demo
- Go to Calendar
- Go to Import/Export-> Manage Publications
- Click the button "Sync" for "MyCalendar" publication.
- As result a synchronization will be performed.
-
- Using the ubiquity sync command:
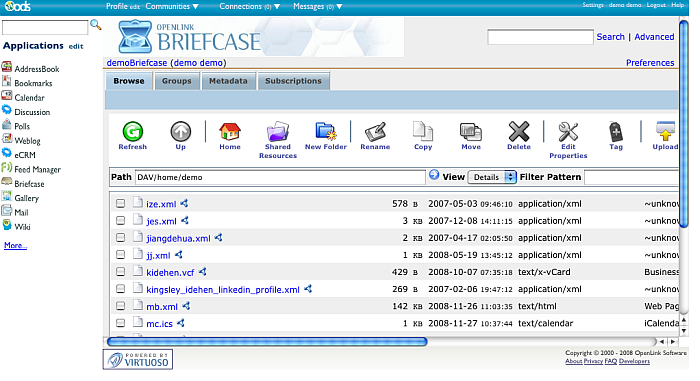
- Go to Briefcase
- As result in the list will be shown the mc.ics file which contains user demo's Calendar from its Demo server Calendar instance.
-
Basic Tutorial Steps
- Authenticate using ODS command mode:
- sid:
- Execute the command:
ods-host http://myopenlink.net:8890/ods
-
- Execute the command:
ods-set-mode sid
-
- Execute the command:
ods-authenticate-user demo password demo
-
- Execute the command:
- oauth: detailed description you can find here.
- sid:
- Execute the command:
ods-get-instance-id demo's Calendar
-
- As result will be shown the instance id. For the "demo's Calendar" instance this should be 522.
- Execute the command:
ods-import-calendar 522 source /DAV/home/demo/mc.ics sourceType WebDAV

or execute:

ods-create-calendar-subscription 522 name MyNewCalendar sourceType URL source http://demo.openlinksw.com/DAV/home/demo/mc.ics  userName demo userPassword demo
-
- As result should be shown message for Success and subscription id for ex.14.
- Now let's perform synchronization of this subscription in the Calendar instance for user demo at the MyOpenlink server.
To synchronize you can use ubiquity command or the Calendar UI:
- Using the ubiquity sync command:
- Execute the command:
ods-sync-calendar-subscription 14
- As result should be shown message for Success.
- Execute the command:
- Using the Calendar UI:
- Go to http://myopenlink.net:8890/ods
- Log in as demo with password demo
- Go to Calendar
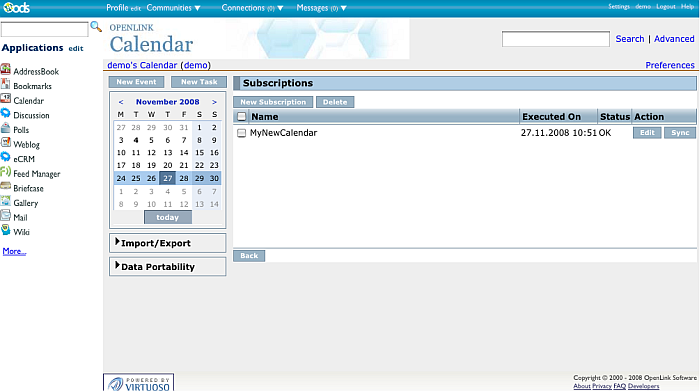
- Go to Import/Export->Manage Subscriptions
- Click the "Sync" button for the "MyNewCalendar" subscription
- As result he synchronization will be performed and for the subscription will be shown status "Ok":
-
- Using the ubiquity sync command:
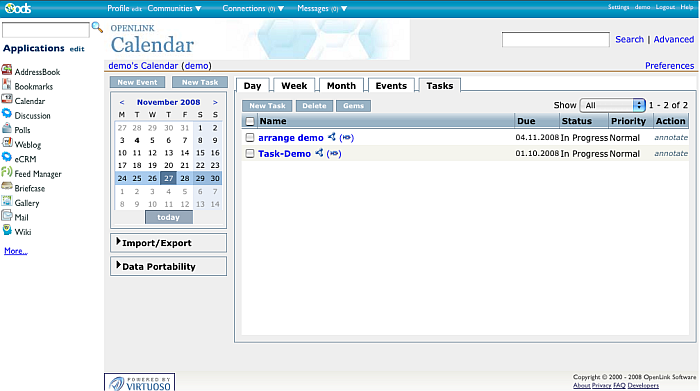
- Go to Calendar Tasks for ex.
- As result will be shown the imported from the subscription Calendar tasks.
-


