VOS.OdsFacebookIntegration
ODS Facebook Integration
The Facebook API as User Defined Type (UDT) is the basis of ODS Facebook integration.
Administrator's Integration Guide
-
Note: The steps below must be performed while logged in as the ODS Administrator (e.g.,
dba); regular users will then be able to use their Facebook data without doing any of this themselves.
- Create a FaceBook ("FB") account here.
- Add a Facebook developer application (from this location) to the FB account created above, by performing the following steps:
- Set the "Callback URL" field to:
http://[host]:[port]/ods
- Specify "Canvas Page URL" field value; this is the Facebook URL where the application will be available.
- Check the "Use iframe" radio-box.
- After the application is created successfully, copy the generated API key and Secret values shown bellow the FB application. The Key and the Secret values can also be found here.
- Set the "Callback URL" field to:
- Install the
ods_framework_dav.vadand therdf_mappers_dav.vadpackages on a running Virtuoso database, using either the Conductor UI or the iSQL tool. - Login as the
dbauser. - Click the name of the
dbauser, shown as a link. - Go to "Edit My Profile"-> "Applications and Web Services" tab.
- Enter the values from above for the
key={this is the API key from the FB site}andsecret={this is the secret from the FB site}values in the Facebook text-area. - Press "Save".
- After successful execution of this list of actions integration setup is complete.
User Interface
-
Note: The steps below can be performed by each ODS user after the Administrator's Integration Guide steps above have been completed by the ODS Administrator (e.g.,
dba).
- Login as an ODS user in
http://[host]:[port]/ods - Click the ODS icon in the beginning of the ODS Navigation bar.
- You will be redirected to you ODS Home page (
myhome.vspx). In the second line of the ODS-BAR (header), next to the links "Edit my profile" and "My applications", you should see the link "My Facebook".

Note: You may need to make sure your ODS bar is set to full mode (by clicking the arrow shown at the left of the ODS Menu bar). - Click the link "My Facebook".
- You should be redirected to the Facebook front page in ODS with URL:
http://[host]:[port]/ods/fb_front.vspx

Note:- The link "My Facebook" will be shown for all regular users once the ODS Administrator has performed the steps from the Administrator's Integration Guide.
- ODS depends on the "
dba" Facebook setting and will ignore any regular user setting when it generates data forfb_front.vspx. - Data generated on
fb_front.vspxcorresponds to the user that is logged to Facebook, not to the user that created the development application.
Functionality of the fb_front.vspx page:
- If the Facebook and ODS accounts are not associated, or if only one account is registered:
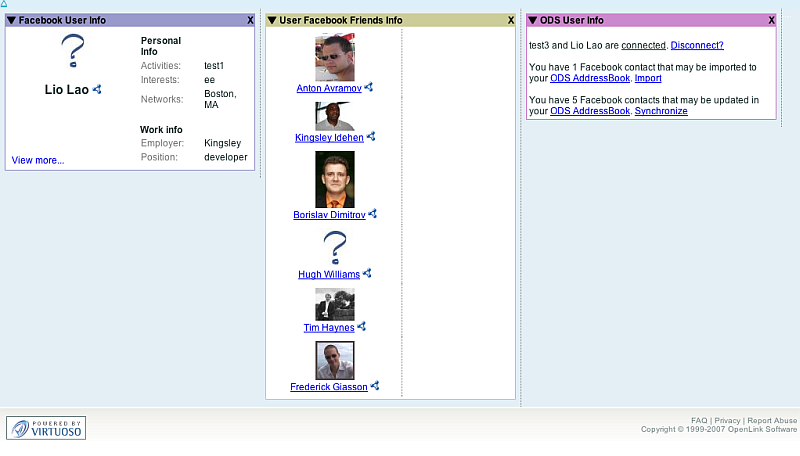
- ODS user is given information about the Facebook user that is currently logged to Facebook (from that same browser)
- ODS user is given information about the Facebook user's friends
- ODS user is given information about status of Facebook to ODS user integration
- ODS user is able create a new ODS user that is automatically associated with the Facebook account.
- ODS user is able to associate their ODS account with the logged-in Facebook account
- If the ODS user has Facebook and ODS accounts which are associated.
- ODS user is able to disassociate the Facebook account from the ODS account
- ODS user is able create ODS-AddressBook and to import Facebook friends as contacts in it.
- ODS user is able to update their ODS-AddressBook (that already exists) contacts based on Facebook friends info.
- Data for Facebook friends of the logged-in user is automatically imported as RDF.
- Information is updated each time user goes to this page.
- After successful RDF data extraction, "rdf" icons -
 - alongside Facebook friend names become anchors that will render the RDF data about them which has been imported to Virtuoso RDF store.
Behavior of the "Synchronize All" page
- Click the "Synchronize" link in the "ODS User info" block.
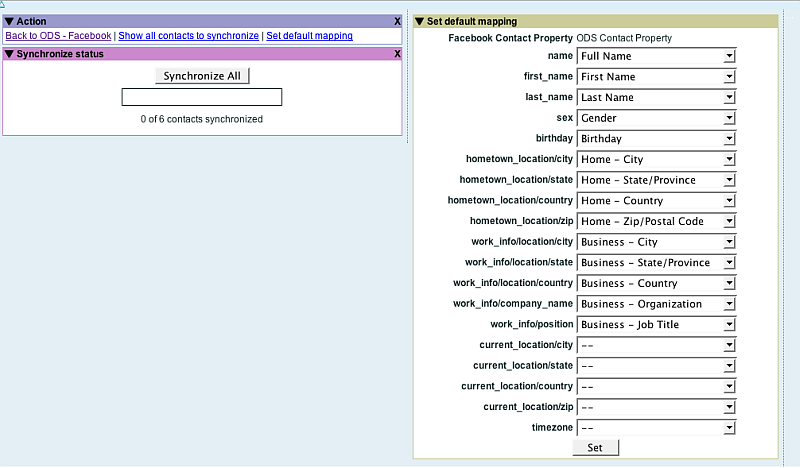
- The "Synchronize all" interface will be opened.

- Click the "Synchronize All" button.
- All existing contacts will be updated (using the first contact that matches synchronization criteria) in ODS-AddressBook using default/custom mapping.
- The user is able to set a custom mapping for synchronization using the "Set default mapping" block. If the user does not set custom mapping, then the default mapping will be used.
Functionality of the "all contacts to synchronize" page
- Click the "Show all contacts to synchronize" link.
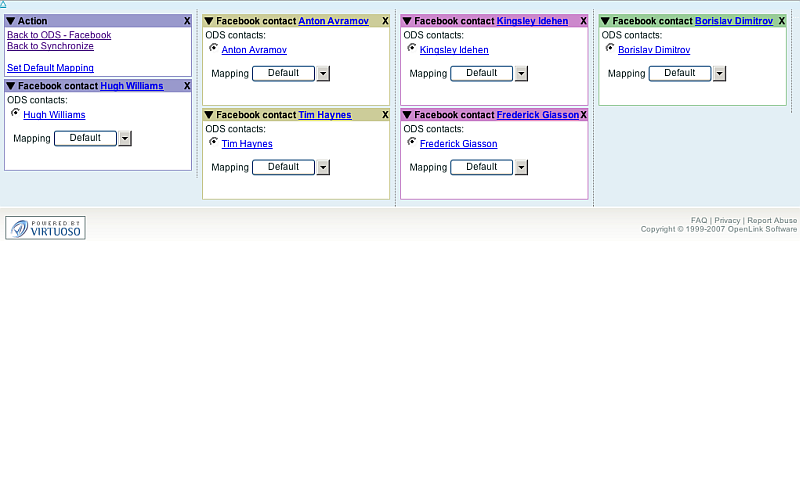
- The "all contacts to synchronize" page will be opened.

- The user is offered the option to synchronize his/her contacts one-by-one.
- The UI presents separate blocks for each FB friend.
- The user is offered all available field value matches for Facebook friends in their ODS-AddressBook contacts.
- By default, the first match is selected.
- The user can change the matching criteria for the synchronization.
- Facebook and ODS-AddressBook contacts are presented with links, so the data for them can be compared, and the right matching pair can be chosen.
- There is a choice to use default or manual mapping for contact properties.
- The Default mapping can be set by clicking the link "Set Default Mapping".
- This feature offers the ability to synchronize in groups.
- When the Default mapping is set, you can click the "Default" button for contacts and proceed further.
-
Manual mapping can be set by clicking the "Manual" button from the combo button available for each user.
- The user will be asked to set mapping, and then contact synchronization is executed.
- The Default mapping can be set by clicking the link "Set Default Mapping".
- The user is offered the option to synchronize his/her contacts one-by-one.
CategoryODS CategoryOpenSource CategoryVirtuoso CategoryHowTo CategoryFacebook? CategoryOdsAddressBook CategoryAddressBook