Google+ Cartridge - Configuration Guidelines
- Configuring the Cartridge for VAL OAuth
- Configuring the Cartridge to Use an API key
- View Your Google+ Profile as Linked Data
- Alternative Follow-Your-Nose friendly view of a Google Data Object that represents a Person
- Paging Options
- Configuring Google+ User ID Detection when Using an API Key
- Google Access Token Retention and Use
- Related
Virtuoso's Sponger cartridge for Google+ allows you to fetch a Google+ user's profile and the Activities they post. These notes, intended for a 'Sponger Administrator', provide brief configuration guidelines for the cartridge.
The cartridge is written to the Google+ API. The cartridge can be configured to use either:
- VAL OAuth (the recommended option) to provide per-user access tokens or
- Google API key (plus an optional OAuth key/secret for Google+ ID detection by the /sponger endpoint)
Option 2 pre-dates option 1. VAL OAuth is the preferred option. Whether configured using OAuth or an API key, only public data is available from the Google+ API.
Configuring the Cartridge for VAL OAuth
Support for OAuth is provided through the Virtuoso Authentication Layer (VAL). All cartridges using VAL as the basis for their OAuth support are configured in a similar manner. For an overview of how to configure a cartridge's VAL OAuth binding, see topic Sponger OAuth Support via VAL.
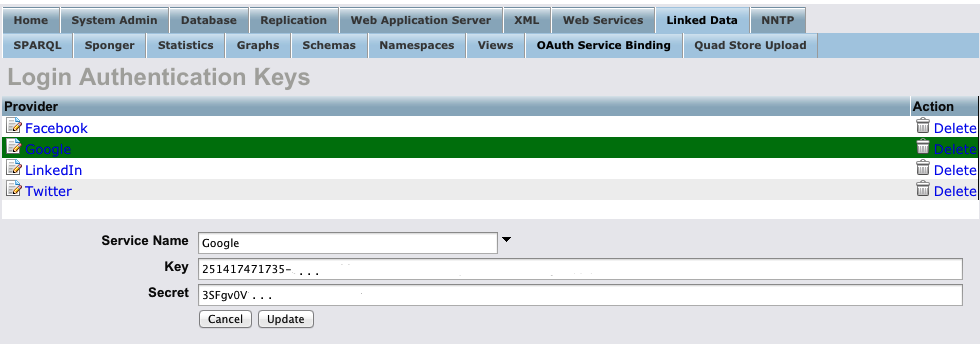
You will need to register OAuth application keys for the Google+ OAuth service in Conductor's 'Login Authentication Keys' panel, accessible through the 'Linked Data' and 'OAuth Service Binding' tabs.
Obtaining and Setting Google+ OAuth Keys
- Go to the Google Developers Console. Create a project if you don't already have one, then open it.
- Under the 'APIS & AUTH' section of the side menu, click on the 'APIs' link and ensure the Google+ API is enabled with status set to 'ON'.
- Click on the 'Credentials' menu item, again under the 'APIS & AUTH' section of the side menu.
- In the 'OAuth' area, click the 'Create new Client ID' button.
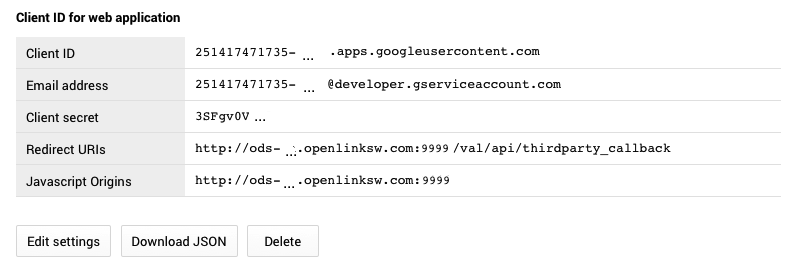
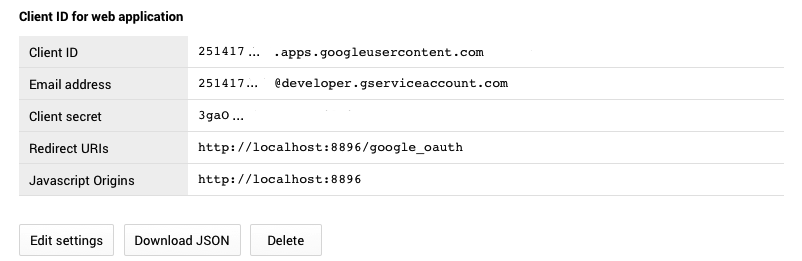
Set the application type to 'Web application' and ensure the Authorized Redirect URI is of the form http://{virtuoso-host}/val/api/thirdparty_callback.
Note the generated client ID and client secret before signing out of the console.
- In Conductor's 'Login Authentication Keys' panel, add Google+ as a service, then enter the client ID and client secret in the 'Key' and 'Secret' fields.
Configuring the Cartridge to Use an API key
Obtaining and Setting the API Key
- Go to the Google Developers Console. Create a project if you don't already have one, then open it.
- Click on the 'Enable an API' button then ensure the Google+ API is enabled..
- Click on the 'Credentials' menu item under the 'APIS & AUTH' section of the side menu.
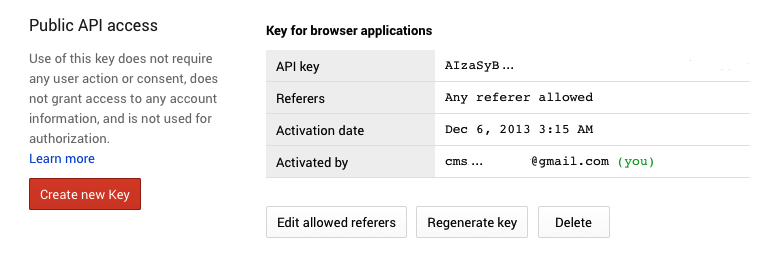
- Scroll down the page to the section 'Public API access'.
- Click on 'Create new Key'.
In the 'Create a new key' dialog, select 'Server key'.
List the IP addresses requests will be accepted from, or leave this field blank as appropriate, then click 'Create' and note the generated API key.
- Now go to your local Conductor at http://your-virtuoso-host:port/conductor
- Go to Linked Data -> Sponger -> Extractor Cartridges:
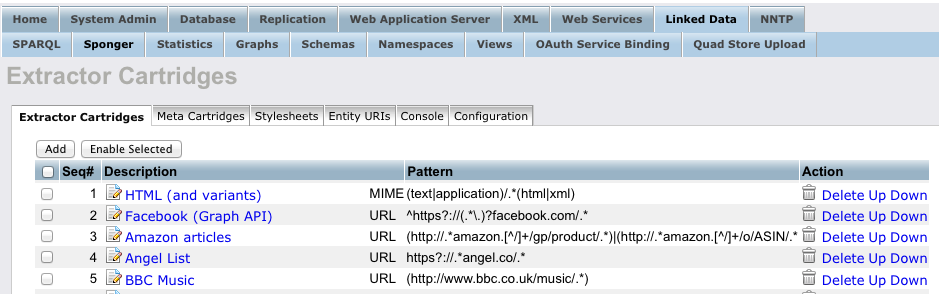
- Find "Google+" and click on its link in order to edit its properties.
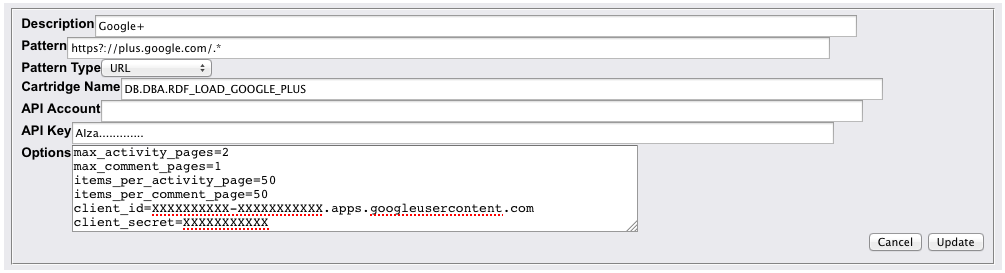
- As result the cartridge's configuration details should be shown (with the 'Cartridge Name' DB.DBA.RDF_LOAD_GOOGLE_PLUS):
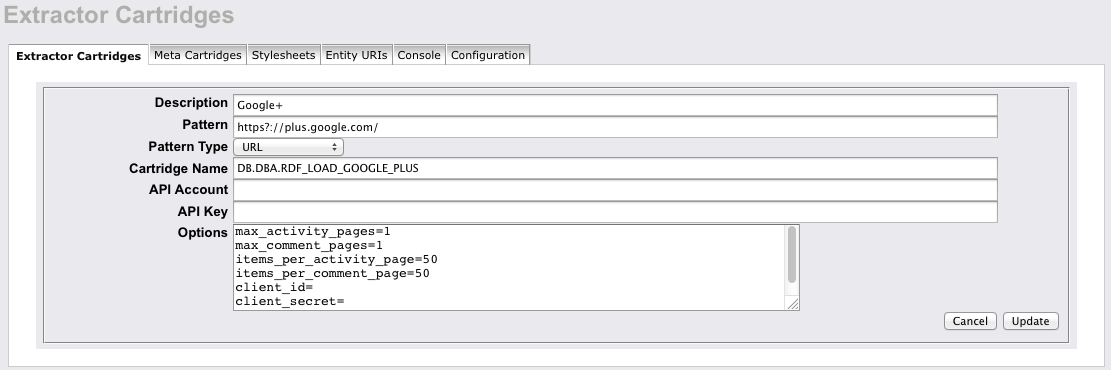
- Enter the API key that was generated from above:
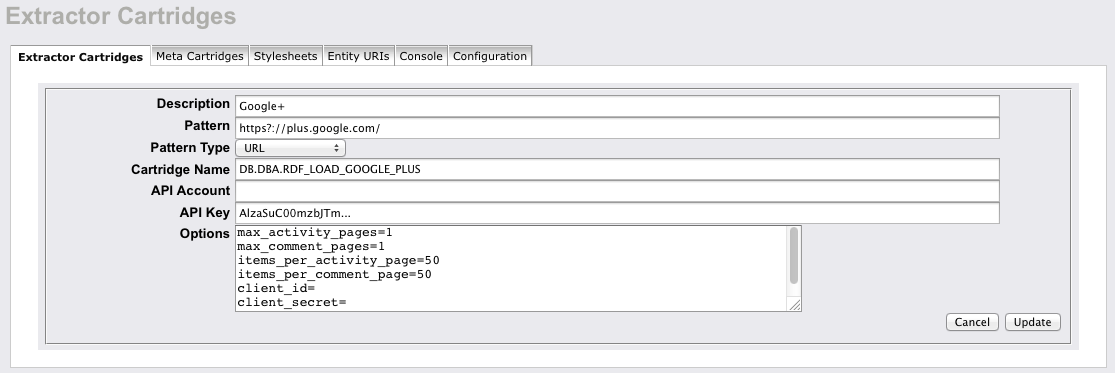
- Click 'Update" to save the "Options" settings.
View Your Google+ Profile as Linked Data
Default installations of a Virtuoso Sponger instance include a Sponger front page, located at http://{virtuoso-host}/sponger, which includes a number of buttons for generating sample Sponger links for particular, typically social site, cartridges.
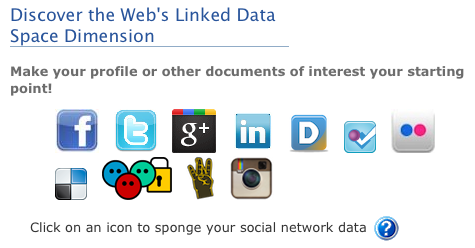
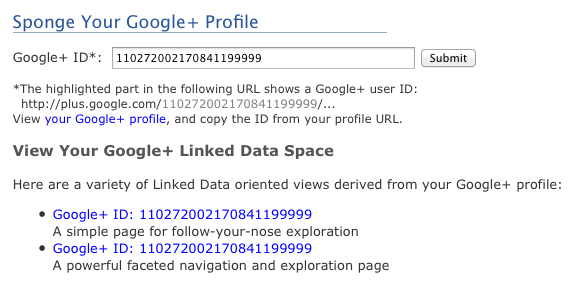
You can sponge your Google+ profile, and transform it to Linked Data, by clicking on the Google+ button.
If the cartridge has been configured to use OAuth, you will be asked to authenticate via your Google+ login, after which the Sponger can determine your Google+ ID. If the cartridge has been configured to use an API key, you will be prompted to enter your Google+ ID (unless a global OAuth token has been set in the cartridge options solely to enable automatic Google+ ID retrieval for /sponger - see the section Configuring Google+ User ID Detection when Using an API Key for details). Once your Google+ ID is known, the Sponger creates sample Sponger links through which you can sponge your Google+ profile.
The cartridge is configured to trigger on the URI pattern https://plus.google.com/.* , i.e. the expected starting point for sponging a Google+ user's profile is a URL of the form https://plus.google.com/{user-id}. The generated sample links proxy this base URL. For example:
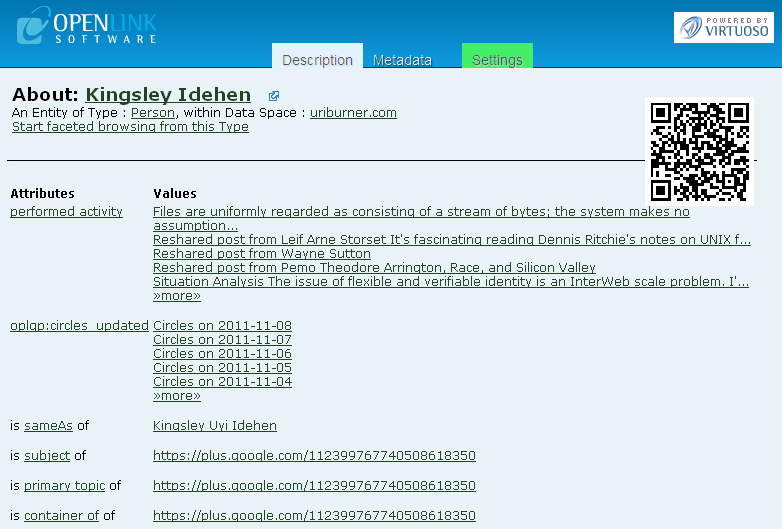
- Sponging http://uriburner.com/about/html/https://plus.google.com/112399767740508618350 using the Sponger proxy /about/html/ yields:
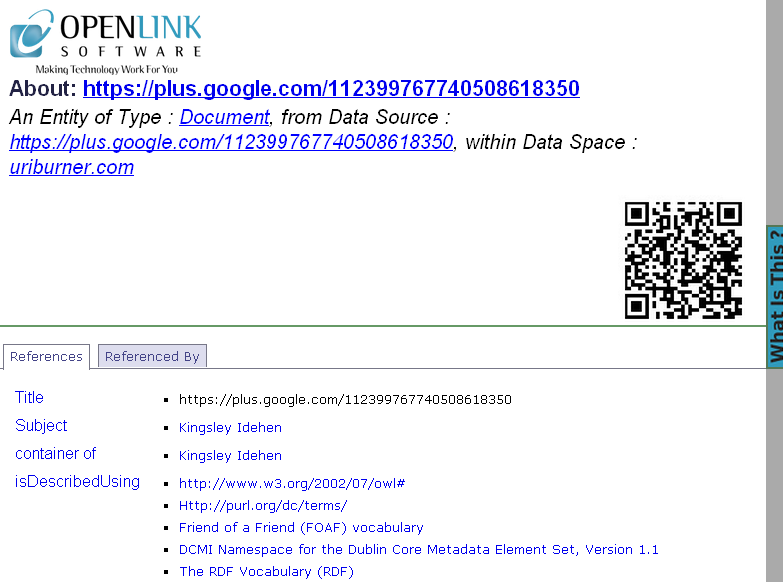
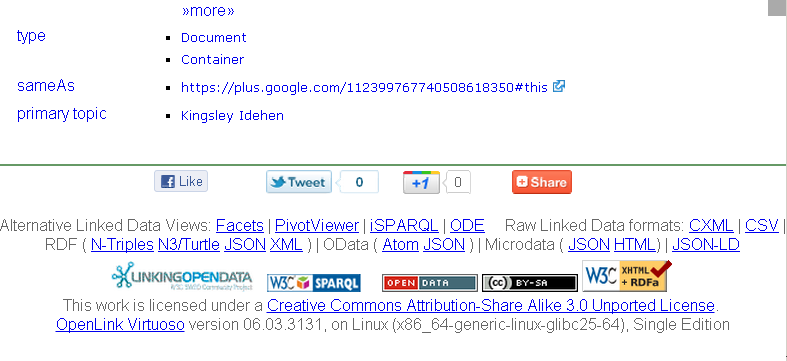
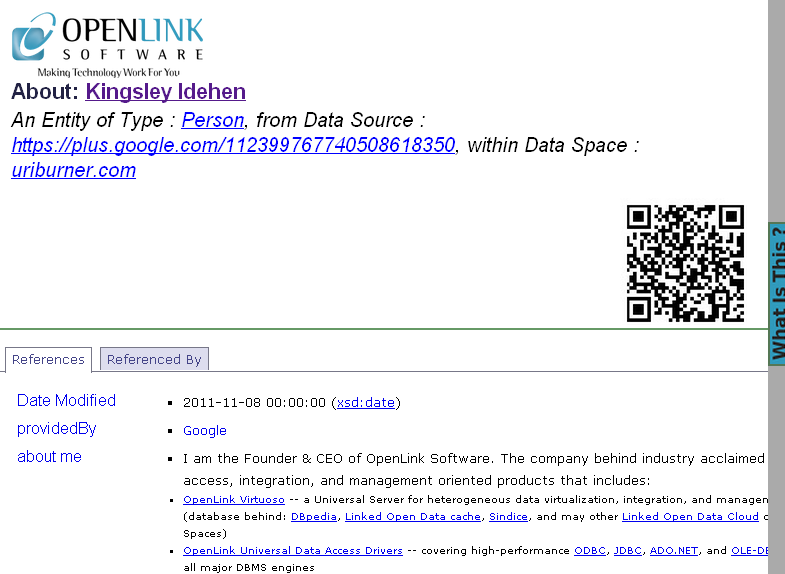
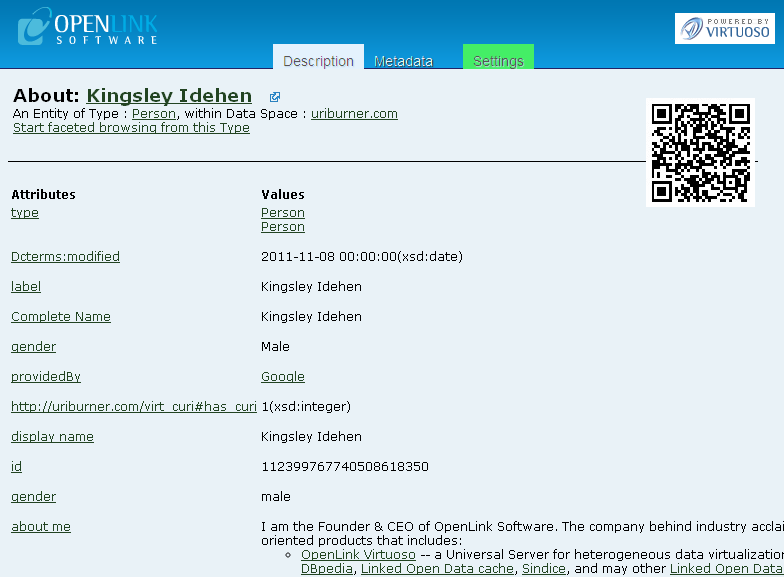
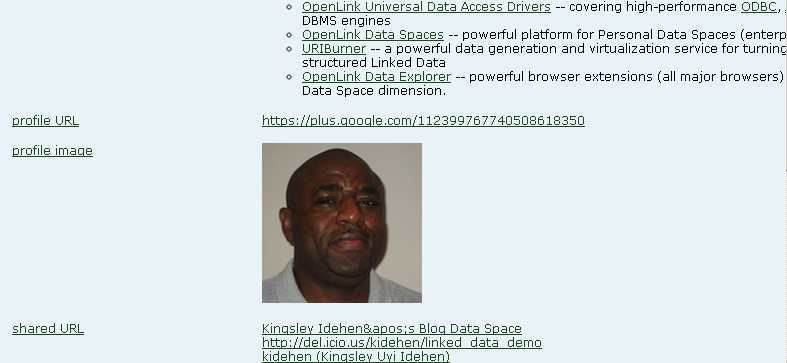
- Clicking on the primary topic value link "Kingsley Idehen" displays:
Alternative Follow-Your-Nose friendly view of a Google Data Object that represents a Person
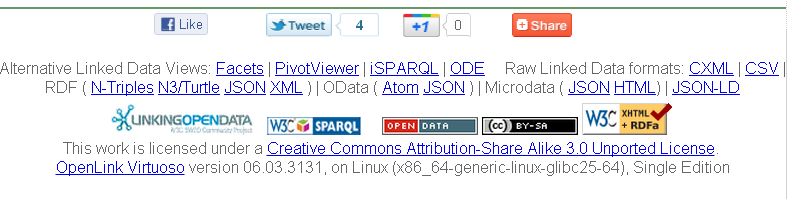
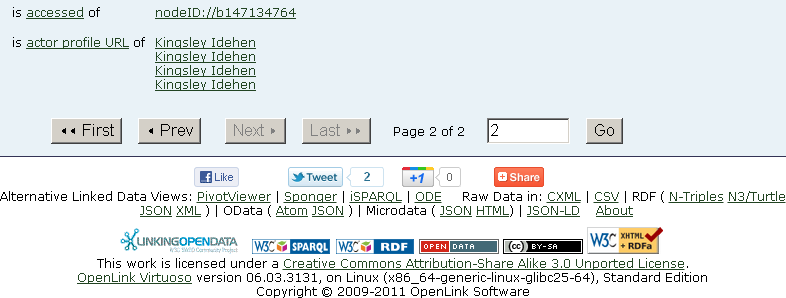
We can take a look at the /fct variant of the primaryTopic object page:
- Click the Facets link from the footer section "Alternative Linked Data Views" of the page from above:
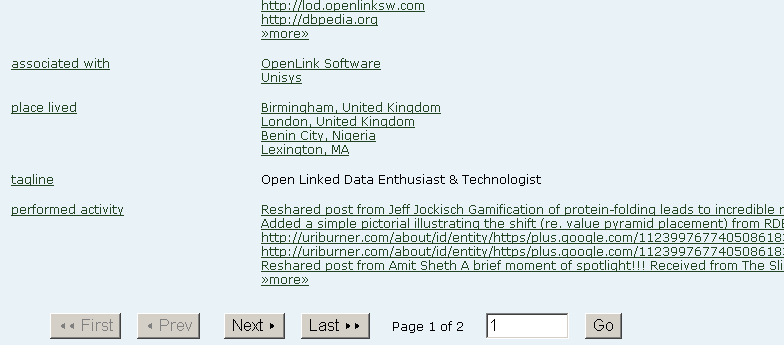

- Click "Next" to view the rest of the Attributes and their Values:
Paging Options
Because some Google+ user profiles can include hundreds of Activities and associated Comments, the following cartridge options are available to set configurable limits on the number of items returned.
items_per_activity_page:- Sets the maximum number of activities returned per page of activities, where 1 <= items_per_activity_page <= 100. (Default: 50)
- Limits the number of pages of activities returned. (Default: 1)
- A value of 0 indicates no limit; all the user's activities will be returned.
- A value of -1 turns off fetching of activities.
- Sets the maximum number of comments returned per page of comments, where 1 <= items_per_comment_page <= 100. (Default: 50)
- Limits the number of pages of comments returned for a particular activity. (Default: 1)
- A value of 0 indicates no limit; all available activity comments will be returned.
- A value of -1 turns off fetching of activity comments.
Configuring Google+ User ID Detection when Using an API Key
When the Google+ cartridge is configured to use an API key, setting a client ID and secret (for Google+ user ID detection by the /sponger endpoint) is optional.
If not set, the /sponger Google+ button requires a user to enter their Google+ ID in order to generate the sample Sponger links.
When configured, the user's Google+ ID can be determined automatically.
The user must simply log into Google (if not already) and grant the Sponger access to their profile.
Note: When the cartridge is using VAL, entering a client-id and secret in the cartridge options as described below is not required.
Configuring Sponger / Google OAuth Handshaking
To obtain a client-id and secret, return to the 'Credentials' section of the Google Developers Console where you obtained an API key as detailed above.
In the 'OAuth' area, click the 'Create new Client ID' button.
Set the application type to 'Web application' and ensure the Authorized Redirect URI is of the form http://{virtuoso-host}/google_oauth.
Note the generated Client ID and Client Secret before signing out of the console.
Next, the Client ID and Client Secret must be saved as option values in the Google+ cartridge configuration.
Select the Google+ cartridge from the Extractor Cartridges tab under the Linked Data / Sponger tab in the Conductor UI.
In the Options text area, enter options client_id=xxx client_secret=yyy, substituting the Client ID and Client Secret values just noted.
Click the 'Update' button to save the new options.
Now, when a user clicks on the Google+ button on the Sponger front page, they should be prompted to log into Google and asked to grant access to the Sponger. If granted, the Sponger accesses their profile, determines their Google+ ID and generates sample Sponger links for the Google+ cartridge.
Google Access Token Retention and Use
In most cases, OAuth-enabled Sponger cartridges retain access tokens for future use to allow an incremental sponge or complete re-sponge of the user's data (i.e. those portions of their data the user has granted access to). Google access tokens are always expiring tokens (even if offline access is specified when requesting a token) and must be refreshed through refresh tokens. They typically expire after 1 hour. Access tokens obtained through VAL are automatically refreshed as needed. Those obtained through a client id and client secret configured in the cartridge options are used only for the initial profile retrieval to build the sample Sponger URIs and are not saved for future use by the cartridge.